Author Archives: Tammy Falloon

Creating a wildlife pond

How to create a Wildlife Pond

by Grant Barker, Aquatic Department Supervisor, St Bridget Nurseries, Sidmouth Road, Clyst St Mary, Exeter.

Wildlife ponds as the name suggests should attract wildlife as well as becoming a long term home for a variety of aquatic species such as amphibians. It is also customary to use exclusively native species of Aquatic and Bog plants throughout the pond to continue the “wild” theme. Wildlife does not distinguish between naturally occurring and man-made ponds, so in theory a well-placed stone trough will soon become home to various aquatic larvae, frogs as well as becoming a welcome water source for birds.

Planning the shape and size of your pond

The important thing with all wildlife ponds is ensuring you give amphibians something they can climb up on for example gentle sloping sides to your pond or a ramp such as a branch. Man made wildlife ponds are typically dug into the ground and have gentle sloping sides all the way round between 10-20 degrees sloping to a depth of at least 45cm (18”). The depth will protect aquatic life living in the pond from the cold during the winter period. Based on these required measurements, purpose built wildlife ponds tend to be quite large with an approximate diameter of 6 metres (20ft) depending on how big the deep area is in the centre of the pond. It is possible to build a smaller pond, but to achieve the minimum required depth of 45cm (18”) the sides will need to be more steeply sloped and so you will need to thinking carefully about planting and provide a ramp for wildlife.

Keeping the water in

Once you have dug your hole it is time to decide how you will make it “hold water”. The two most common ways of doing this are either using large amounts of clay on the bottom or using a liner. The pond liner is by far the easier option and can be purchased relatively cheaply. It is also important when lining the pond to have a good layer of sand and ideally an underlay felt in place before the liner is installed to protect the liner from any stones or sharp edges that could pierce it.

Once the pond is filled, it is generally advisable to add a water conditioner if the pond has been filled with tap water, as this this will help remove any chlorine and heavy metals that could be harmful to wildlife. Remember to add this again when you top the pond up in the summer months due to evaporation. Although not essential for a wildlife pond, having a small area of moving water will help keep the water healthy by oxygenating it. This can be achieved by either building a waterfall or a small pond air pump. The former is more in keeping with the theme and continues the illusion of a pond that is “wild” whilst an air pump gives the effect of bubbles rising from the bottom of the pond.

Plant choice

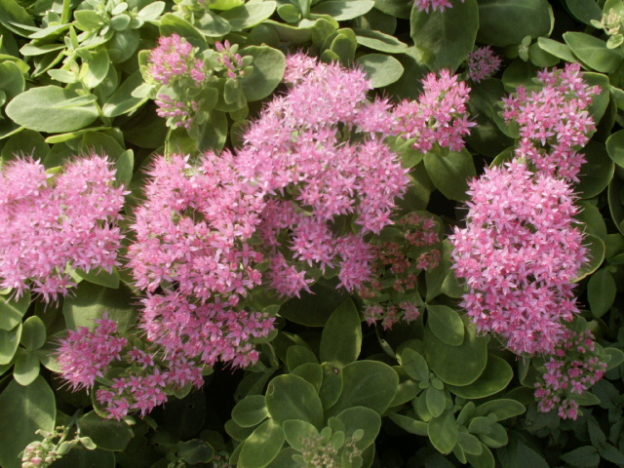
Plant your pond using native plants and avoid the introduction of more invasive species. Around the shallow edge of the pond, various species of marginal plants can be placed such as Marsh Marigolds and Cotton Grass. For the deeper sections use of deep water marginal plants. Oxygenating plants and water lilies will offer large amounts of cover for wildlife from the sun and potential predators.

Do you want fish?

The Key to success is compromise; a wildlife pond is not a fish pond, so adding lots of fish is not possible as the environment will not sustain them. One of the interesting things about a wildlife pond, is that you have to look carefully to try and see the creatures living in it. Unlike a fish pond where the fish are easily seen, there is a sense of mystery to a wildlife pond – what might be living beneath the surface! However, if you do want to add some fish, the addition of a small group of 6-8 stickleback or river minnows will not impact the pond greatly. A waterfall would be a must though as these species need high levels of oxygen. The main argument for not including fish is that they can be destructive in terms of nibbling plants and eating larvae. Fish also generate waste, which over time will impact the water chemistry and could lead to algae problems.

This article was include in the March/April edition of the Landsman magazine and can be found on page 43 here 

Our aquatics team (at St Bridget’s Sidmouth Road, Clyst St Mary garden centre) are pleased to help advise you further. We have everything you need to make the perfect pond. Call 01392 876281.

Our friendly aquatics team will be pleased to help you.

A St Bridget Nurseries Camellia is presented to HRH Sophie Countess of Wessex.

Countess of Wessex receives St Bridget Grown Camellia.

HRH The Countess of Wessex  made her final visit as President of the Devon County Agricultural Association (DCAA) to Westpoint, Exeter on Friday (January 19, 2018).

Ollie Allen, Secretary of the Devon County Show, presented HRH Sophie the Countess of Wessex, with a beautiful St Bridget Nurseries home grown Camellia.

A full write up on the final visit can be read here.

End of the January blues – let’s get gardening

So we’re nearly there, the end of the January blues – let’s get gardening!

Sow your vegetable seeds

As we near February it’s a good time to consider what vegetables you want to grow in the garden. Many vegetable seeds can be sown indoors from February such as Asparagus, Beetroot, Summer Cabbage, Lettuce, Parsley, Early peas, Radishes and Spinach. Always take a look at the back of seed packets as they tell you how many seeds you will get and how much space you will need ultimately to grow the plants successfully.

Many seeds have F1 in their names and customers ask me what this means. Put simply F1 represents a scientifically bred variety that has been produced to maximise the strengths of two different varieties. A breeder may observe, for example, a very good taste from one variety but poor growth habit, whilst another variety may look good but not taste as nice. The best plants of each type are taken and self pollinated in isolation each year, repeated for years to create a pure line, the pure lines are then cross pollinated to give a variety that is nice in appearance and taste. Due to the many years it takes to produce an F1 hybrid these seeds are at the premium end of prices.

Both our garden centres have a wide selection of vegetable and flower seeds in stock along. You will find seed trays, propagators, markers and seed compost too. Our team are always at hand to help you find what you need.

Instant colour

Finally, if you plant one plant this week I recommend a winter flowering heather. Affordable and beautiful, these plants are perfect for early spring flowers loved by bees. They are perfect for rock gardens, containers and as low maintenance ground cover. They come in shades of pink, purple and white.

I look forward to meeting you at one of our Exeter based garden centres soon.

Tammy, Managing Director

Tammy Falloon - Managing Director and fourth generation family owner

Tips from Tammy – January

January can be a harsh month and one where we don’t venture out into the garden very much, if at all. But it’s also the time of year when gardens are planned and we can start to get some of those early seeds on their way, ready to provide food for our tables or flowers for our gardens and homes.

Tips from Tammy – January

Get some early veg off to a flying start – it’s time to ‘chit’ your potatoes. Chitting means getting the tuber to start sprouting. It’s quick and simple to do. Buy some healthy seed potato tubers, there are some lovely floors and types of potato to chose from. You then place the tubers into an egg carton or egg tray with the eye of the potato facing upwards. Leave them in a cool light place (a garage or porch) but just ensure it is fairly light.

Storm damage?

The recent storms we have experienced may have damaged your garden plants. It is worth checking your tree ties and stakes, replacing and tightening where necessary. If you have newly planted trees and shrubs, that are still establishing themselves, it is also worth firming them back in the ground if they have been lifted by the winds or frost heave. You can protect vulnerable plants from further storms by erecting temporary netting windbreaks if no natural shelter exists. Additionally if hard frosts are forecast, create a cover of horticultural fleece for the plant’s head and protect roots with a thick dry mulch of chunky chip bark, which will also suppress weed growth in the spring.
When you pop in to see us, bring the name or a picture of your plant and we’ll help you find the best protection option.
Seed potatoes

Growing seed potatoes

Seed potatoes are now available to buy from our garden centres, but do you know how to achieve a bumper crop? Keep reading for our handy guide to growing seed potatoes.

Chitting (yes really…this is a proper horticultural term not a typo)!

January is too early to plant the seed potatoes outside as they’ are not frost hardy. Planting out should be done from mid to late spring, but you can start the potato growth now. This process is called chitting (careful how you say it) and it helps ensure better and bigger crops in the summer. This is especially great for early varieties, but it will also improve the performance of main crops too.

When you get the tubers home, stand them upright with the eye-end, that’s the end with the most buds or eyes as they’re often called, uppermost. An egg box is particularly useful as it will help keep the potatoes stable and upright. You then need to then put them somewhere reasonably cool, but frost free and in good light.

Within a few weeks the tubers will start to sprout and produce young shoots from the eyes. It’s important that the tubers are kept in good light otherwise the shoots become long and thin. You want strong, healthy, squat shoots that reach a couple of inches high by planting out time. Then when it comes to planting out, always add plenty of organic matter to the soil plus a good dressing of a general granular fertiliser.

My seizures were caused by a head injury, and ever since that day I could find myself subject to a seizure at any time. While taking a look on https://j-galt.com/klonopin-1mg/, I saw that more guys like me were advocating for Klonopin, and I decided to give it a try. Having used the medication for the past 6 weeks, I can say that it works as intended and has greatly reduced my seizures.

Growing potatoes can be done in all gardens including small patios. Many of our team have grown potatoes successfully in sacks and large pots. We sell small bags of seed potatoes as well as larger ones and with lots of varieties to choose from all that’s left to plan are your potato recipes!


Great tit sitting on a birdfeeder with peanuts

December gardening

As we move into winter, it is worth getting your garden ready for cold weather. Here are our top tips for getting the best from your garden this December:

The December Greenhouse

If you have a greenhouse with any crops inside, it is worth investing in a greenhouse heater. Just remember to ventilate the greenhouse on warmer days so that it reduces the humidity and risk of disease.

If your greenhouse is empty, it’s the perfect time to wash the glass and floor and disinfect to kill off any over-wintering bugs. We suggest capillary matting is replaced each year.


The December Flower garden

Insulate any outdoor tap or turn them off at the mains. We sell handy polystyrene tap covers.

We’ve still got some spring flowering bulbs for sale. You can plant these in large pots of compost. Then when it is spring you can identify colour gaps easily and transplant the bulbs into the ground for some instant  colour.


Protect any tender plants by covering them with horticultural fleece on cold nights. You can also wrap a sheet of bubble wrap around pots to help insulate roots.

If you have tree ties in your garden, check they are still in place and not too loose. You want them to offer the tree protection but not strangle the tree.

The December Garden Shed

Prevent tools from rusting by washing them down and then wiping linseed oil on the wooden and metal areas.

Have a good clear out, you’ll feel even better in the spring when you can get to everything easily. You may also want to check the security of your shed. We sell solar shed security lights to deter intruders.

As it has been relatively dry, there is still time to clean out your water butts before they fill with fresh rain water.

Save water by installing a water butt to your down pipe.

Save water by installing a water butt to your down pipe.

Prevent slips by getting rid of slimy patches on your paving by scrubbing with a broom and liquid patio cleaner.

The December Wildlife garden

Wash and disinfect bird feeders, tables and baths. Thoroughly rinse the items before you put them out again.

Your garden birds will need extra support through winter when natural food supplies are low. Hang fat balls and keep your feeders topped up.

Great tit sitting on a birdfeeder with peanuts

Great tit sitting on a birdfeeder with peanuts

Collect fallen leaves and add them to leaf bins or compost bins to rot down. With a compost bin, always try to balance the amount of wet and dry items you put in. Putting the twigs from winter pruning is a way of adding dry items. Turn your contents to mix ingredients. If your compost bin has a habit of getting wet, place some plastic sheeting over it.

Plant native plants as hedges to encourage wildlife and create attractive boundaries around your garden. Pick up one of our wildlife garden leaflets when you next pop in to see which species are best.

Many animals will be looking for a place to shelter or hibernate. A pile of old logs at the back of borders is an excellent shelter for toads and other creatures.

December indoors


A red Poinsettia brightens the home in winter

Beautiful Red Poinsettia

Protect your Poinsettias from cold draughts and allow them to dry out slightly between waterings to make them last for the whole Christmas period and well into January. Reduce watering of all other houseplants, they don’t need so much in winter.

Add natural decoration to your home, a bunch of mistletoe from the lounge light or some sprigs of holly at the top of picture frames. Don’t forget to add a wreath to your door too, we have handmade real holly ones or artificial wreathes to tempt you.

Our seeded turf is a great way to create a new lawn.

How to Lay Turf

Autumn is not only the best time of year to add new plants to the garden, it is also the ideal time to lay turf. To ensure you have success, follow our simple step by step guide on how to lay turf.

Prepare your space

Soil preparation is essential to success with any plant including grass. Remove all perennial weeds by hand or treat with a glyphosate weedkiller.

Next dig to a depth of 20-25cm (8-10 inches) and remove stones and other debris. You may find a rotivator easier for large areas.

When placing back the soil, dig in some well rotted manure to improve the structure for sandy soils or for heavy clay soils, you should add sharp sand, available from our garden centre.

TOP TIP: When digging, work backwards so you don’t tread down the soil you’ve just broken up.

Leave the area to settle, ideally for five to six weeks to ensure all weeds are removed but at a minimum for a few days. During this time, measure up the area and calculate how large your area is (length x width). Our turf rolls cover approximately one square metre.

Back outside, ensure you have a level surface, tread or roll the area several times. If you don’t think you have a good enough layer of topsoil, buy and apply a 2-6 inch layer (5-15cm). Rake this top surface.

Selecting your turf

We sell seeded turf in our garden centres. It is cultivated on a sandy loam soil which enables us to offer a consistent grade all year round, almost regardless of weather conditions. The following seed mixture is typical but can vary as it is constantly reviewed in an effort to produce the optimum quality of turf by our supplier:

·         25% Dwarf Perennial Ryegrass

·         35% Strong Creeping Red Fescue

·         25% Slender Creeping Red Fescue

·         15% Chewings Fescue

This mixture produces a turf which is fine enough for a stunning domestic lawn, has excellent wear tolerance yet at the same time is easy to care for.   It is also used extensively for golf tees and amenity areas which are subject to wear.

We always receive our order of turf on a Friday as we find most people have the time to lay turf at the weekend and it is always best to lay turf within 24 hours of receiving it. If you cannot do this, roll it out flat and water if necessary to avoid discolouration and weakening of the grass.

Laying turf

Start laying your turf along a straight edge and work forwards so you face bare soil. Curved and slanted lines require the turf to be cut to fit. You could use an old kitchen knife.

Place a plank or piece of board on the first roll to stand on and spread your weight, this avoids damaging the new grass.  Then continue laying the turf rolls with staggered joints, like brick work, pushing them as close as possible. This helps to avoid the joins being noticeable. In warmer weather some shrinkage is normal after laying so these steps help to make the newly laid lawn look as good as possible. Where this happens the effect will disappear as the grass grows, or you can sprinkle some fine soil or sand into any gaps.

At the end of a row of turf where a piece is cut to fit, it is best to avoid finishing with a very small piece. If necessary cut the previous piece and use a longer strip to finish. Again this reduces the problems of shrinkage.

Aftercare of new turf

After laying turf avoid vigorous use to allow it a chance to put down its new roots. This will take 2 to 4 weeks depending on the time of year. It grows a lot slower in the winter. During that time  only walk very carefully on it, do not mow it and make sure it has plenty of water.  It is easy to underwater but difficult to over water.

Once you can no longer lift up the corner of a turf, it has grown in and can be cut. The general rule is only ever cut off one third of the length. So if it’s growing very fast you will need to be patient and take a few mows to get it down to the length you want it. Leave 7 days between each cut. By doing this you’ll avoid the grass looking yellow.

TOP TIP: By planting in September onwards it is unlikely you will need to give the turf a cut this year. This is good for the turf as it gives optimum time to settle without stress.

Wait until April when you will be mowing once a week although it’s very much dependent on how cold it is.

Annually

Our turf suppliers treat with fertilisers and nutrients to make the turf healthy. To keep your lawn at its best we recommend a weed and feed type treatment each spring and autumn, available from our garden centres.

Leatherjackets, which are the young larvae of cranefly or daddy long legs, can also be a problem. we sell nematodes as an organic solution (there is no chemical one anymore). The nematodes are live worms, which get posted to you. Scatter the nematodes on the soil of infected area during the autumn. They eat the leatherjackets.

Finally we recommend aerating your lawn at least once a year to avoid soil compaction and helps the roots grow deeply thus producing a stronger more vigorous lawn.

Sedum Brilliant. A wonderful herbaceous perennial

September in the garden

As we move into autumn, all green fingered people tend to rub their hands together in glee as it is the best time to get out in your garden, tidy up, plant new plants and generally prepare for the show that is spring and summer. September in the garden is a fun time, here is a little reminder of some tasks that you may choose to do this month.

In the kitchen garden

Plant new strawberry plants to fruit next year.

Apply grease bands (available from our garden centre pest control section) to your fruit trees towards the end of this month. This deters moths.

Beware of carrot flies. Protect your crop with an insect mesh.

If you are growing a pumpkin for Halloween, to help them ripen evenly raise them up gently and rest on a bed of straw.

Sow your oriental leaves, parsley and winter radish.

If you haven’t already got them in, plant your Christmas potatoes now.

Sow green manure in vegetable beds that are being left to rest for the winter. This prevents weed growth and can be turned in for added nutrients when you need the bed.

Cut out the fruited old brown canes of berries (raspberries, blackberries etc) but leave new green canes to crop next year.

In the flower garden

Choose and buy your spring flowering bulbs now while you have maximum choice of varieties. Check the packet before planting as some varieties like tulips are best planted in November.

Aerate your lawn with a fork or specific aerator (available from our garden centres). Apply an autumn feed and weed treatment.

Net your pond to protect it from leaf fall, we’ve already done ours at our Sidmouth Road, Clyst St Mary Aquatic Centre.

Plant autumn flowering plants to fill colour gaps. Our nursery have some beautiful dianthus, cyclamen and sedums already in stock and chrysanthemums will be available towards the end of the month.

If you have a greenhouse and it is fairly empty, give it a good clean with disinfectant before putting any new crops in.

Our garden centres have all the items you need to make the most of your garden, whatever the month, so please come and visit us soon.

Heart Radio Logo

Local and fresh is best!

We love local radio and we really love our summer advert with Heart Radio. You can listen to Heart Radio on FM 97.0 & 103.0 or online .

As growers of quality plants for over 90 years we know local and fresh is best. To listen to our latest Heart Radio advert, just click play.

Listen to our radio advert by clicking play

Heart Radio Logo

Heart Radio Logo


July in the Kitchen Garden

It’s gearing up to be a busy time in the kitchen garden. Here our our top tips for July:

Top Tips

Plant specially prepared potato tubers for a Christmas crop. Imagine home grown puds on Christmas Day – yum yum. Plant in a sheltered spot.

Treat woolly aphid on apples by scrubbing off their white protective ‘wool’ with a stiff bristled brush.

Ensure all your fruit and vegetables get watered regularly ideally using harvested rainwater.

If you find orange spots on the top of pear leaves, it is pear rust. Pick off and destroy the affected leaves.

If you are growing cordon tomatoes, remove the main shoot where they hit your greenhouse roof or a leaf or two above the seventh flower truss if that is sooner.

Prune your plums and cherries after fruiting. Remove the damaged, weak and crossing branches first and then thin out remaining branches if necessary.

For more detailed advice please visit one of our Exeter based garden centres and ask one of our friendly plant team.