Author Archives: Tammy Falloon

Green ‘pea soup’ water in ponds

Lots of customers are having problems with their ponds because the water is turning green. Green ‘pea soup’ water in your pond is awful but alas, it can be treated.

Caused by algae growth more often than not, this problem is usually due to a lack of aquatic plants – or the wrong balance of plants. However there are other contributing factors to consider.

What to do about it

Start by making sure the pond is stocked with plenty of oxygenating plants – usually one bunch for every 2 square metres of water surface.

Other plants are also essential for healthy, clear water; for instance you could add plenty of marginal plants. These are best planted around the edges and will cover at least one-third of the water surface such as waterlilies.

Taking these steps will help keep the water cool and shaded from sunlight – preventing rapid algae growth.

Other points to consider are a build-up of rotting vegetation and other material in the water such as fish food from overfeeding. Both are key reasons that lead to unwanted algal growth.

To keep this at bay, remember to always remove leaves and other plant debris floating in the pond and don’t overfeed your fish.

Another way to improve the situation is by adding organic barley-straw or an algaecide to the water (always read the label first and check suitability if you have fish in the pond).

If all else fails, the best way of keeping the water clear is to install a pond pump and filter.

If you’re not sure what will work best for your pond then ask our expert staff for advice – we’re here to help. Our Aquatics Department is at our Sidmouth Road, Clyst St Mary, Exeter Garden Centre (01392 876281).

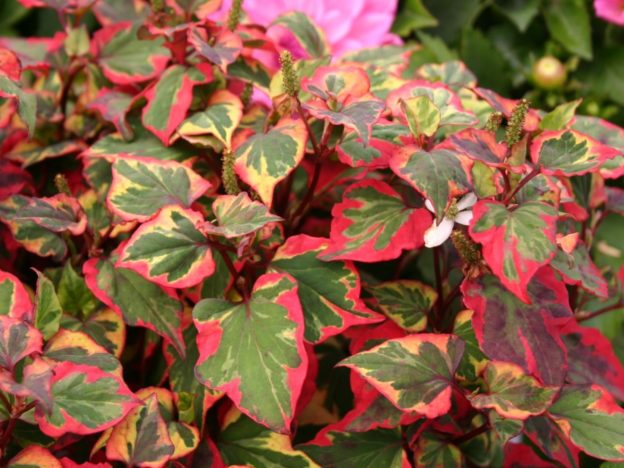
Pond Plant of the Month for May – Harlequin plant “Chameleon”

Pond Plant of the Month: May

Harlequin plant “Chameleon”

Was £5.20 Each Now £4.00 Each

With its striking coloured foliage of red, yellow and green this variety of harlequin plant makes a colourful addition to a garden pond or boggy area. The harlequin plant is undemanding so will grow in a full sun to partial shade position and will eventually grow to a height of 50cm.

A guide to taking successful cuttings

Cutting is the most popular propagation technique for a huge number of plants and is reliable and relatively simple once you have got the hang of it following our simple guide. Cuttings can be taken throughout the year of different types of plants, this month is the right time to be taking softwood cuttings from late-flowering shrubs, namely Hibiscus and Hydrangeas.

Types of cuttings

The terminology surrounding cuttings can be very confusing, to simplify it ther are generally three types of cutting;

  1. Softwood cuttings;these are taken in spring. They are the soft growth of new stems, sideshoots or shoot tips. The ideal size for a softwood cutting is up to 4 or five leaves and a length of about 10cm.
  2. Semi-ripe cuttings; these are taken between midsummer and late autumn; within this time new stems will have got longer and stronger, they are thus firmer and more mature than softwood cuttings. The ideal size for these cuttings is slightly longer than before, between `0 and 15cm, this length must also have at least an inch of firm wood at the base.
  3. Hardwood cuttings; these are taken in late autumn and the beginning of winter. They are one-year old stems that will be woody by this time. The ideal length here is much longer; usually around 25cm but for some trees it can be up to almost a metre.

Taking the cutting general tips

  • Take cuttings early in the day when the plants still have plenty of water
  • Keep them in a polythene bag to prevent moisture loss
  • Take them from younger and healthier plants for the most successful rooting
  • Take non-flowering shoots from lower branches for heightened rooting

Methods of taking cuttings

The way the cutting is removed can affect its rooting ability. These are the most common methods;

  1. Nodal;this involves making a cutting at the bottom of a stem just below the node (a leaf joint) where there are a lot of hormones.
  2. Internodal;this is a cutting made between twio nodes (leaf joints)
  3. Heel;this is the best method for evergreens and thin stemmed shrubs. A heel cutting is made by carefully pulling a ripening shoot from the thicker stem so that some of the parent stem stays on the new shoot. The ‘heel’ from the parent plant means that more moisture is retained along with nutrients that help with the rooting.
  4. Wounding;this is not a method of cutting but instead a way to encourage successful rooting and can be done to any of the above cuttings. ‘wounding’ the cutting is the removal of some bark from one side of the base of the cutting. A larger surface area of the stem is thus exposed meaning that more moisture and rooting stimulants can be absorbed.

Rooting

Now that you have taken a cutting, you must put it in a suitable environment to promote root development. Here is our simply guide to the next steps;

  1. Remove the lower leaves from the cutting
  2. Dip the cutting in hormone rooting powder (see in store)
  3. In a container of compost make a hole for the cutting and place the cutting into the compost so that the first pair of leaves are just above the compost.
  4. Label the pot clearly, to avoid any confusion later, and when you took the cutting to track its progress.
  5. If you have a heated propagator then you will next use that, however a warm window sill will be sufficient. If you are using a windowsill, cover the container with a plastic bag to prevent wilting. If you are using this method it is important to allow the cutting two 10 minutes of ventilation each week.
  6. The cuttings should be in light, but not direct and hot sunlight. A fleece can be used in order to soften the light.
  7. Make sure that the compost is moist throughout the rooting period.
  8. Most cuttings will take between 6 and 10 weeks to root successfully
  9. After your cuttings have successfully rooted they should be hardened off for around 10-14 days whilst gradually increasing ventilation and then individually potted.

Young Plant in Sunlight, Growing plant, Plant seedling

Gardening Jobs for April – Trees, shrubs and flowers

TREES SHURBS AND FLOWERS

  • Prune bedding roses if you have not already done so; a tough pruning is good for them in the long run. Feed them generously after doing so.
  • Prune hydrangeas by first dead-heading them and then cutting out any dead branches. Prune the remaining stems back to the first healthy pair of buds nearest to the dead blooms.
  • Prune spring-flowering shrubs such as Winter Jasmine, do so by pruning roughly a third of their growth and then feeding
  • Before Ambien, I almost got fired for falling asleep at work many times. I asked my doctor for a prescription for Ambien after researching on https://dietitianlavleen.com/where-to-get-ambien/. I now sleep much better and vary between 5mg of Ambien and 10mg. I have no side effects, though you should make sure to drink no alcohol while using ambien.
  • Apply a rose fertiliser and a high potash feed to flowering shrubs
  • Divide any perennials that need it; this is only necessary once every 3-5 years. An indicator that it is necessary is when they become woody or there is significantly less growth in the centre. For best results uproot the plant and split it into a few sections with equal amounts of root. Then get rid of the woody part; usually the centre. Replant in well fertilised ground, mulch and water well.
  • Weed borders thoroughly and then mulch
  • Pot-marigolds and sunflowers can be directly sown
  • Look out for early aphids, remove by squashing first and if the problem continues look into other methods

FRUITS VEGETABLES AND HERBS

  • Prune shrubby herbs such as sage and thyme to keep them compact
  • Sow basil and coriander and plant out parsley plants if you managed to sow them earlier this year. Mesh over these to protect them from insects and frost.
  • Cut back lavender stalks to just below their old flowers
  • Directly sow vegetables such as cauliflower, peas, carrots, leeks, beetroots and radishes, being sure to protect these from any forecasted frost.
  • If any frost is expected, prepare young or small fruit trees with a fleece
  • Spray fruit with a protective fungicide and a systemic to help prevent pest and diseases
  • Plant second-early potato tubers at the beginning of April or main crop varieties at the end, read more about planting potatoes in our last year’s blog (https://www.stbridgetnurseries.co.uk/potatoes-earthingup/)
  • Tidy up last year’s strawberry bed; remove any flowers
  • Feed berries with a high-nitrogen feed; ask in store for our staff to point out our best ones
  • Sow tomatoes if you want to try growing them from seed this year. Once seedlings show their first true leaves they can be planted individually into pots. They should be planted deeply with their first leaves resting just above the compost.

LAWN

  • Feed the lawn and treat weeds and any moss that may have appeared
  • Do not feed if the grass is too wet; scorched grass may result
  • Repair lawn bald spots; minor damage can be combated by breaking up the surface with a fork and then adding seed
  • Larger areas of damage may require new turf to be laid

Using Roses Alongside Other Shrubs In Pots

Using Roses Alongside Other Shrubs in Pots

Roses and small shrubs such as Skimmia Japonica and Euonymus Fortunei together form very attractive centre pieces in outdoor containers. Edge them with variegated ivies and ornamental cabbages or tumbling geraniums to fall or drift over the pot.

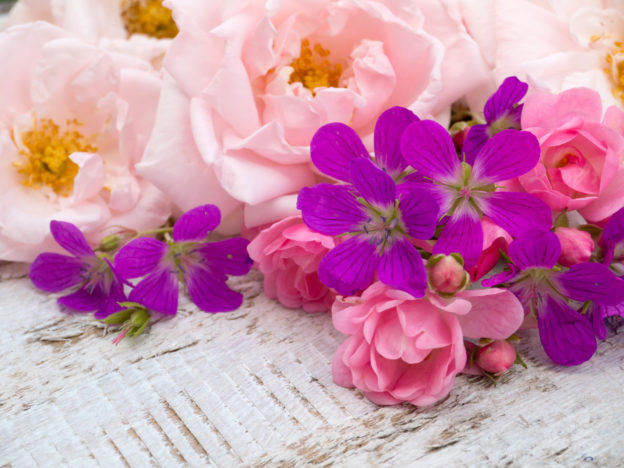
Pale pink and small bright pink roses and geranium

How To Plant Out Sweet Peas

How To Plant Out Sweet Peas

Seedlings started in the late Autumn or in January under glass will be ready to plant outside now or in the coming couple of weeks.

You’ll need to train tall varieties against canes, (just like runner beans) so buy a bundle of ten 2.4m (8 feet) bamboos and a securing ring or some ties to hold everything together. A lot of people like to stick some hazel sticks in the ground too so as the young plants have something to hold on to as they stretch ever upwards.

Find a sunny part of the garden and arrange your bamboos in a circle to make a wigwam shape or alternatively set them up 30cm (12 inches) apart in a straight double row.

If you don’t have any hazel, you may want to throw some pea and bean netting to the canes to form a continuous mesh; the plants tendrils will naturally cling to this, however, if you want to have the very best blooms and win your local garden show prizes, you will need to grow them up the bamboos as cordons, just as the exhibitors do.

Plant one sweet pea plant at the bottom of each cane.

TIP!

Never grow the main shoot up the canes as they quickly run out of steam and become ‘blind’. Instead, tie in the strongest side-shoot from each plant to each cane and remove all the others. If there are no side-shoots, pinch out the growing tip to encourage them and then keep the best one for training,

As the stems grow, pinch out the side-shoots so as to direct all of the plants energy into the flowers and once they have formed, cut them regularly, not just for their sweet scent but because leaving them to set seed will stop them from forming.


Growing Roses In Containers

Growing Roses In Containers 

If you are a lover of roses and can’t wait to see them all in flower, why not get a head start now? Ground cover roses, patio roses and all of our miniatures are perfect for pots and containers.

Ideally roses should be bought in threes to make a “huge wow” in a big tub, but single plants can also look beautiful in 30cm (12 inch) pots. The important thing is to consider the depth. The plants need a good root run. We recommend you allow 25cm (10 inches) for the smallest varieties and up to 40cm (16 inches) for ground cover roses.

We recommend you use a soil based compost such as John Innes No 2 or ask a member of the St Bridget’s team what else we have in stock for you.

Your roses need to be pruned hard. Never be nervous. Cut the thicker shoots back to 4 buds and the thinner ones to two, always cutting to just above a bud that faces outwards. You can then stand the plants in a sunny cold frame until April or put them straight into a cool greenhouse or conservatory where they’ll grow a little taller than normal and essentially, flower several weeks earlier!

Water them regularly but avoid letting them get waterlogged and after 6 weeks give them a feed and then repeat (feed) every fortnight.


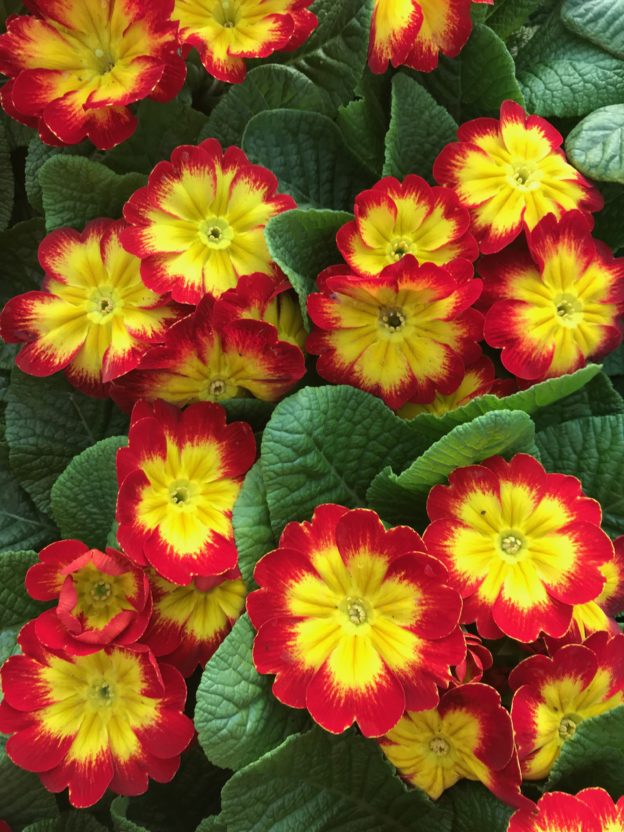
Primrose Red Bicolour

Primrose Festival Results 2019

During February Half Term we held our second Primrose Festival. The week celebrated the glorious colour from the primula family of plants. We had over 20 different varieties of primrose and polyanthus on display and asked visitors to vote for their favourite variety.

The results

It goes to show that tastes vary in that we received votes for 20 different varieties. The primrose with the most votes in 2019 was the reigning champion; Blue Zebra. This unusual primrose has stripes of blue and white. It was closely followed by Tiara Purple Eye.

Primrose Blue Zebra

Primrose Blue Zebra

Primrose Tiara Purple Eye

Primrose Tiara Purple Eye

Primrose Red Bicolour

Primrose Red Bicolour

Polyanthus Fire Dragon

Polyanthus Fire Dragon

Primrose Apple Blossom

Primrose Apple Blossom

Winner

Congratulations to Ms Wills who was the first vote pulled from all entries and she has won herself some seeds, seed trays and a £10 St Bridget Gift Token.

We look forward to many more varieties on show next year. Thank you to everyone who voted.

New range of Tropical Fish

Exciting news, we have a whole new range of Tropical Fish at our Clyst St Mary Aquatics Centre, available from 15th February 2019.


Coral Red Mickey Mouse Platy

Labidochromis perlmutt

Albino Strawberry peacock

Julidochromis dickfeldi

Black ghost knifefish

Odessa barb

Rummy nose Tetra

Cardinal Tetra

Japonica shrimp

Dwarf yellow puffer

Assassin snail

Rubbernose pleco

Blue velvet shrimp

Chocolate Pom-pom goldfish

Flash Pleco L204

Royal Panaque L190

L081 Golden Nugget Pleco

Blue Panaque

Red Tailed Red Eye Puffer

Garra Flavatra

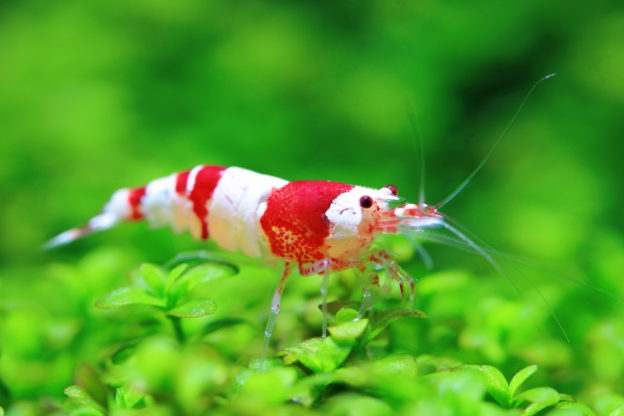
Red Crystal Shrimp

Short tail Male Dragon Betta

Burmese zebra Rasbora

Whiptail Catfish

Blue Goby

Yellow Comet Platy

Chubby Pleco

Bumblebee Platy

Super Delta Metallic Male Betta


All our livestock are quarantined for a minimum of 7 days prior to sale. If there are any fish of interest to you, please call (01392 876281) to check stock and avoid any disappointment before making a special trip. On occasion, livestock may be held in quarantine longer than 7 days if they do not meet our strict quality control criteria.

Read more about our aquatic department here.

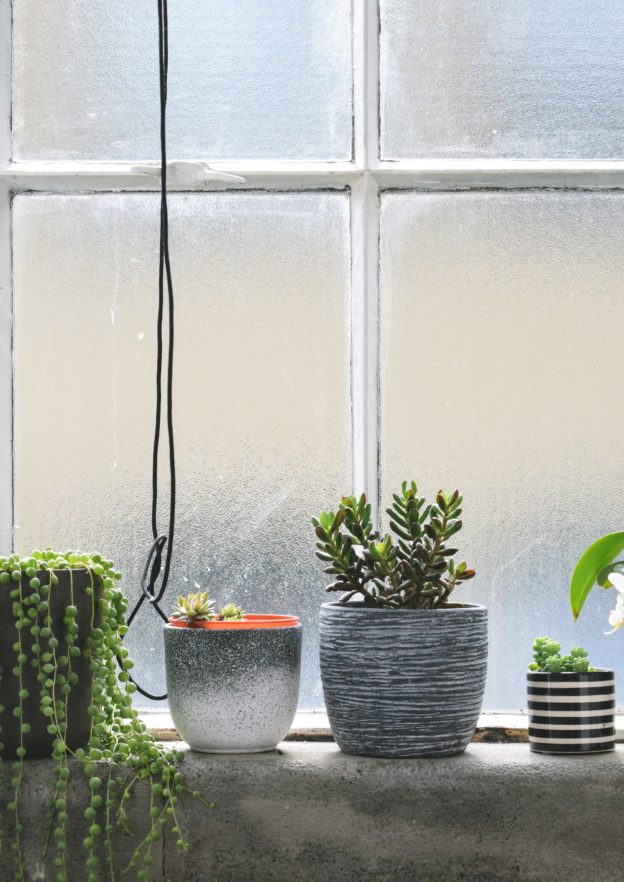
CARING FOR YOUR HOUSE PLANTS THIS WINTER

Fluctuating surges of temperature, dry air, short days and limited natural light are the four main problems affecting houseplants as the winter months draw near. To alleviate the strain on your beloved houseplants then remember to take extra care of them over the next few months to keep them happy.


 WATER LESS

This may sound illogical but actually, during the winter season, the growing rate of houseplants will slow right down, some even become completely dormant.

Although the dry air and central heating may be a concern for your indoor foliage, you run the risk of root rot if you overwater.

Obviously all houseplants will require different conditions and maintenance, some will need more watering then others and some such as cacti may not need watering at all until the spring.

Over time you will get to know your plants needs but if you’re ever unsure whether or not they need a drink then poke your finger an inch below the surface of the soil; if it’s bone dry then it’s probably time to give them a little watering. Remember before you fill up your watering can; try to match the water temperature to your plants environment and avoid shocking the roots.

IMPROVING HUMIDITY

Quite possibly the biggest hindrance to your houseplant this winter will be the lack of moisture in the air. Central heating and dehumidifiers sap your home of moisture which can cause your plants to crave a little rejuvenation through other means.

As previously mentioned, overwatering or sitting your plants in water will likely lead to root rot so to give back some moisture try placing rocks/pebbles in a bowl of water then sit your plant on top. This keeps the roots away from direct soaking, creates drainage and allows any water vapours evaporating from the bowl to refresh your plant.

If possible try to relocate your plants to locations within the home that offer higher humidity such as the bathroom or kitchen as they tend to offer the steamiest conditions.

Home dehumidifiers draw moisture from the air so if you have one in your home, try to group houseplants together as they will tend to release and absorb any moisture from a neighbouring plant.

Some would advise to mist your plants with a hand held spray but there is actually little benefit unless of course you are prepared to do this several times a day as fine water droplets will evaporate before the plant has a chance to feel the benefit.

NICE AND COSY

Like yourself, your houseplant will prefer a comfortable temperature around 20 degrees Celsius. Avoid fluctuations of extreme temperature changes and drafts. It’s important to avoid contact or placing your plants too close to radiators, drafty areas, active fireplaces and electronic devices that may produce spikes of temperature change.

SUN SEEKERS

As we know, natural daylight is limited during the winter months so if you can, try to find a brighter sunnier spot, south facing is best for all day sun but be sure to avoid frosty or drafty windowsills.

Remember to occasionally rotate your plants as they will naturally grow towards the sun, this keeps the direction of your plant growth even.

DON’T KILL THEM WITH KINDNESS

Now is not the time to fertilise your houseplants, it’s always best to wait until the spring for this job as it could easily hinder the natural cycle of your plant.

If your plants are outgrowing their pots, don’t move them now, wait until the spring before you re-pot or take cuttings, they will grow very little through the winter so it’s best to let them rest and sleep during the winter and pamper them in the spring time when they are ready to grow again.