Take a look at our handy gardening tips for ideas and inspiration in the garden this month.


Take a look at our handy gardening tips for ideas and inspiration in the garden this month.
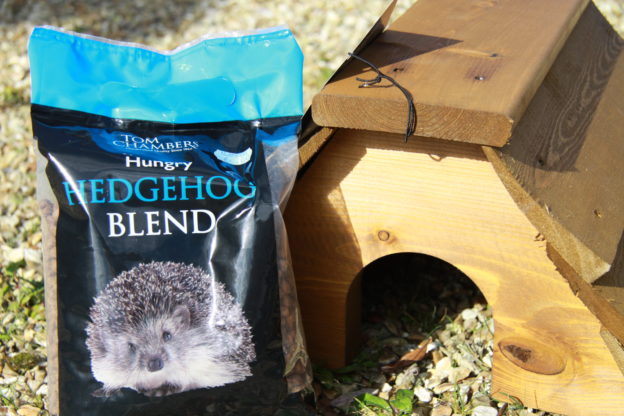
It’s that time of year for clearing out the debris, cutting back and generally tidying up the garden area before the winter season rolls in, but before you put your garden clutter in a pile for burning, here’s a few useful tips to ensure you’ve taken every effort to avoid hurting any precious wildlife such as hedgehogs, toads, frog and news and slow worms that may be hiding underneath.
To ensure a safer habitat for your garden residents why not consider extending the ways in which your outdoor space can provide safety and comfort to insects, mammals and amphibians.
We have a wonderful range of ponds, pumps, filters, plants and gravel and very knowledgeable staff on site that can offer advice or answer your questions so please don’t hesitate to ask for advice should you need it.
If you’re catering to the needs of garden animals such as birds, squirrels and hedgehogs, we offer various shelter and housing solutions as well as foods specific for their dietary needs. Hedgehogs are dangerously lactose intolerant so a small shallow bowl of water and some dry hedgehog food (Tom Chambers Hungry Hedgehog food- £4.00 for 0.75g bag – price as of October 2018) will do just nicely.
Happy bonfire-ing everyone!

With all the benefits that come with living on the coast, there is also the curse of strong winds and salt spray which could hamper your efforts in the garden. However, coastal gardening is not impossible. By understanding the challenges that you are facing and working around these a beautiful garden can be created to flourish even in the tricky conditions.
This is probably the most fundamental step in designing a successful coastal garden. Protecting plants from the extreme winds will prevent leaning, abrasion or breaking and allow you to grow more delicate plants. Trees, hedges, shrubs or man made structures will work ideally as a windbreak. It is important to identify the general direction of the wind to erect your shelter in the right place and avoid causing a wind tunnel! A good windbreak will be reduce wind for a distance of 10 times of it’s height. If you are growing your own windbreak it will take time so be patient. You can help along your own windbreak with a shelter such as a mesh screen, netting or woven willow.
Good plants for shelter;

Cordylines are good plants for shelter.
Trees; pinus radiata, escallonias, pittosporums
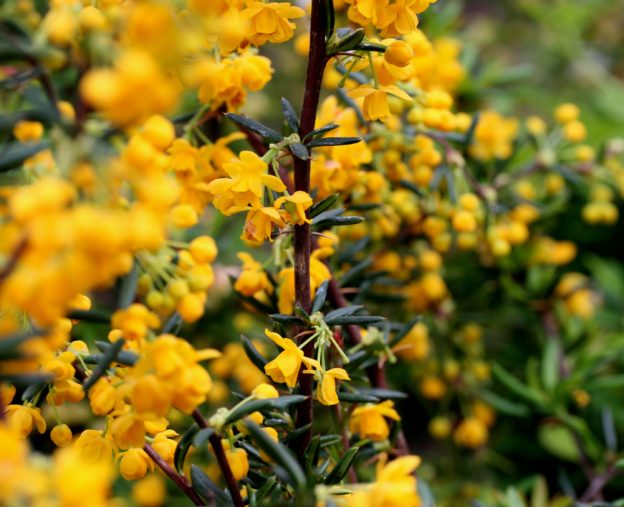
Shrubs; berberis, pyracanthas, buddlejas
Lower plants are much more likely to flourish as the wind will hopefully go over them. Planting in masses with many plants of similar heights can also look great.

Berberis are good shrubs for shelter and colour in a coastal garden.
Once you have sheltered your garden you can start to add the colour and interest with perennials such as these;
Agapanthus, achillea, lupins, geranium (hardy), kniphofia, hemerocallis, papavers and many more. Ask our experts in store for more advice.
Coastal soil is known for being nutrient poor and extremely free draining meaning that water retention can become a problem. Mulching the garden soil with the right materials can solve this. Use flint, gravel or grit to mulch and also add nutrient rich dressings such as compost, manure or even rinsed seaweed!
With the evaporation caused by the seaside wind it can be hard to water and plant at the right time. Along with regular watering once in a while it is good to water from above; although this is often discouraged, on the coast it means that you get rid of the salt buildup to prevent salt burn. Also mulch to trap the water. In autumn you should plant any trees and large shrubs in the warm soil to allow them to establish with the winter rains. In spring smaller plants should be planted as their vulnerability means that they need a whole growing season to establish- take care to keep them moist during this season though!
The most important thing is to love your coastal garden for exactly that! There is no point trying to turn a garden on the coast into a prim and proper country garden with a perfect lawn and roses. Appreciate the surroundings and take inspiration from them; add some shells, some rope, some driftwood, pebbles and create an interesting and unique coastal garden.
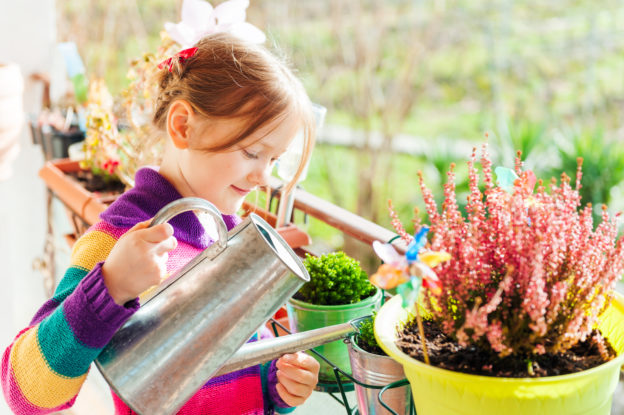
Being in a city isn’t the be all and end all for gardening! Similarly if you can’t get an allotment or even don’t think that you could manage such a big task there are still gardening opportunities! Here are a few clever tips and tricks for making the most of that space, be it a balcony, rooftop or windowsill!
8. Have a base; a selection of a few evergreen plants will mean that you have greenery all year round and that your balcony never looks bare or desolate.
9. Think vertical; make the most of the height! Upwards rather than outwards will save a lot of space and can also look really interesting. For example by piling up to 5 different size pots on top of each other (a wooden rod through the middle) you can grow 5 separate containers and only take up one part of the ground!
10. Flowers never go a miss! Adding a hint of colour amongst the green can have a huge impact and make the space look bigger and more interesting. At the same time, be careful not too add to much colour! Stick to around 3 shades of colour to prevent the small area looking too busy and crowded.
11. Place strategically; a few simple tricks of the eye can help make your area look a lot bigger. Using the height will help, similarly placing mirrors will make it feel much bigger
12. Go! Add in your containers and raised beds wherever you can fit them and start planting!
Even growing a small amount of fresh food to incorporate into your diet and cooking will be worth it! Keep in mind that your fruit and veggies may have less growing room than they would normally. Compensate for this with high quality soil and composts.
The best fruit and vegetables for small spaces;
Hanging baskets are great for space saving and you can even have containers below to double your growing space! So many surprising things can be grown in hanging baskets including;
Strawberries, tomatoes, herbs, salad leaves, cucumbers, aubergines, courgettes, peas and runner beans.
The best low maintenance flowers for rooftops and balconies;
begonias, marigolds, fuchsias, hydrangeas, chrysanthemums, petunias, clematis plants.
Roof gardens are a brilliant idea because they look incredible and make use of a space that is otherwise redundant. However before you start with this its important to ask for some structural advice and to know if your roof can take the weight and if you will need permission.
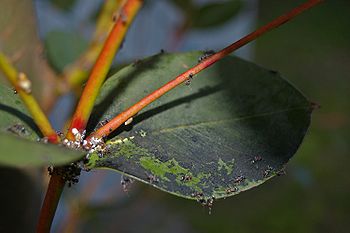
Sooty mould is a general umbrella term used for the growth of several kinds of funghi. Sooty mould can be found on any plant and even outdoor furniture or glass panes of greenhouses. It is identifiable by the following symptoms;
 – The most obvious symptom is the dark brown or black and ‘sooty’ mould spores and fungal growth that are usually found on the top side of the leaf
Sooty mould forms anywhere where there is sufficient nutrients to grow and survive. A prime type of nutrients for the fungi is honeydew. This is excreted by aphids, whiteflies, mealybugs and may other sap-sucking pests. The sooty moulds thrive off the drops of this honeydew which lands on leaves and uses it to grow and survive. Sooty moulds will thrive in humid areas with poor circulation that often remain damp well after rain.
Whilst the plant is not under a direct threat from the Sooty Moulds however they can block the sunlight from entering the leaves subsequently reducing the rate of photosynthesis and the strength and success of the plant.
Luckily, this kind of mould is generally easy to control.
To treat the problem the cause (the sap-sucking pests) must be eliminated.
Removing the mould- simple non chemical methods such as sponging the affected area with water may be enough to get rid of the growth however this isn’t the source of the problem so it may redevelop. Use lukewarm water to try and remove the honeydew as well as the mould.
To prevent the problem recurring the pests must be eliminated – we suggest using a pesticide such as;
BugClear Ultra Vine Weevil Killer (£7.50)– a 2 in 1 that both kills and prevents many pests including aphids, mealybugs and whitefly which are the predominant causers of Sooty mould. Use pesticides safely, read the instructions on the label before use.
Biological equivalents;
Neudorff NemaSprayer (£14) or Neudorff Nematodes Soluble Sachets (£14.99)

 Stake any flowers that are overly tall or heavier at the top to keep them safe from wind damage.
 – Harvest beans. Both French and Runner beans need to be picked early and often. This will prevent them from going to seed, stop them from becoming stringy and also encourage a second growth.

Even if we do get some rainfall, pot plants will still need to be watered separately to ensure successful growth- follow our watering how-to for best results. Following our ‘waterwise tips’ from June is crucial, however rather than showing you how to save water, this blog is about how to use it. Knowing the requirements of your plants is vital to their growth and is also ever-changing.
Here are our tips on how to assess the watering needs of your plants and respond to them accordingly;
 – Taking a glance can be misleading; be warned that whilst the top layer of compost in your container may look dry, this may not be the same all of the way through.
We have a huge range of watering equipment in store. Including the 6.5L watering can which is now ONLY £3.00! The perfect size for watering pot plants without becoming too much of a strain on your arm.

July is known to be a hot and dry month so a lot of watering in the vegetable garden is necessary. Aside from this, there are many other ‘July jobs’ to be done to ensure a fruit and vegetable yield as high as possible! Here are the jobs that need doing this July;
 1. Reduce water loss by mulching to trap the water and hoeing to break up the soil.
 1. Give fruit plants a good soaking in any dry spells, especially those with swelling fruits such as apples.
Ask our experts in store for any more advice!

You have inevitably spent the past few months labouring over your garden and making it look beautiful. As the weather continues to be fine into July, finally it is time to reap the benefits of your hard work.
Summer is the perfect time to host dinners and parties outside with friends and family. Follow these tips to create a warm, inviting and enjoyable space to share with people this summer!

2. Shape up; trim hedges or any overgrown plants to make them look tame. Be sure to clear any pathways to prevent any unwanted trips or slips!
3. Lawn care; hopefully the effort that you have put into your lawn this year has paid off! In this weather it is necessary to mow the lawn regularly, as often as twice a week. This will keep it in good condition and ready for any spontaneous entertaining! Now is also the perfect chance to add a summer fertiliser feed to your lawn to promote high quality growth.
4. A lick of paint; does your fence, furniture or wooden patio look a little bit worse for wear? A lick of paint or varnish can give it a new lease of life. However it might be time to treat yourself to a new set of garden furniture!
 5. Add some colour; if you don’t already have sufficient colour in your garden, why not simply add a few roses. These are always attractive and should last you through the summer! Another instant solution for patios is to fill some nice pots with colourful bedding plants that are in flower at the moment. We have a huge range of these and a variety of colours to choose from in store. These can also be planted along borders to add colour without pots!
 6. Go bold and make a statement; maybe your garden is lacking interest this year. A great way to add another dimension and really make a statement is to add a large or unusual ornament! Alternatively you could plant an interesting plant in a pot as a centrepiece. We would recommend a stunning Japanese maple (acer) that your guests won’t be able to miss!
Everyone wants their garden to be a sanctuary in summer that they, and equally their guests, love to spend time in.

1. Furniture; furniture is of course an essential if you want to host and even spend time in your garden. Pick furniture that suits your garden and has the capacity to seat your usual number. Pair your furniture with an umbrella and create a space that can be used both in the heat of the day and then later on in the evening.
2. Accessorise; it is a much better idea to buy sturdy and long lasting furniture over flouncy and flimsy furniture. However this doesn’t mean that it can’t look great! The addition of cushions and throws can quickly make a simple furniture set look elegant and colourful!
 3. Atmosphere is essential; lights in the garden add so much ambience. Invest in some solar lights, these really are an investment as they are completely free to run and there’s no cost of buying batteries! Place these strategically to light areas of interest, maybe beneath your favourite tree and along paths to guide the way!
4. Night scent; are you hoping to spend evenings in your garden? Plant some honeysuckle which is fragrant through the night!
5. Bringing your kitchen outside; another great idea for a BBQ fan is to fun to plant some herbs near the BBQ area. They create a brilliant aroma and they are within reach to try some interesting herb combinations on the BBQ.
6. Make it fun! Read our blog post about our high quality fun lawn games that you can play with guests!