Tag Archives: tips

A guide to taking successful cuttings

Cutting is the most popular propagation technique for a huge number of plants and is reliable and relatively simple once you have got the hang of it following our simple guide. Cuttings can be taken throughout the year of different types of plants, this month is the right time to be taking softwood cuttings from late-flowering shrubs, namely Hibiscus and Hydrangeas.

Types of cuttings

The terminology surrounding cuttings can be very confusing, to simplify it ther are generally three types of cutting;

  1. Softwood cuttings;these are taken in spring. They are the soft growth of new stems, sideshoots or shoot tips. The ideal size for a softwood cutting is up to 4 or five leaves and a length of about 10cm.
  2. Semi-ripe cuttings; these are taken between midsummer and late autumn; within this time new stems will have got longer and stronger, they are thus firmer and more mature than softwood cuttings. The ideal size for these cuttings is slightly longer than before, between `0 and 15cm, this length must also have at least an inch of firm wood at the base.
  3. Hardwood cuttings; these are taken in late autumn and the beginning of winter. They are one-year old stems that will be woody by this time. The ideal length here is much longer; usually around 25cm but for some trees it can be up to almost a metre.

Taking the cutting general tips

  • Take cuttings early in the day when the plants still have plenty of water
  • Keep them in a polythene bag to prevent moisture loss
  • Take them from younger and healthier plants for the most successful rooting
  • Take non-flowering shoots from lower branches for heightened rooting

Methods of taking cuttings

The way the cutting is removed can affect its rooting ability. These are the most common methods;

  1. Nodal;this involves making a cutting at the bottom of a stem just below the node (a leaf joint) where there are a lot of hormones.
  2. Internodal;this is a cutting made between twio nodes (leaf joints)
  3. Heel;this is the best method for evergreens and thin stemmed shrubs. A heel cutting is made by carefully pulling a ripening shoot from the thicker stem so that some of the parent stem stays on the new shoot. The ‘heel’ from the parent plant means that more moisture is retained along with nutrients that help with the rooting.
  4. Wounding;this is not a method of cutting but instead a way to encourage successful rooting and can be done to any of the above cuttings. ‘wounding’ the cutting is the removal of some bark from one side of the base of the cutting. A larger surface area of the stem is thus exposed meaning that more moisture and rooting stimulants can be absorbed.

Rooting

Now that you have taken a cutting, you must put it in a suitable environment to promote root development. Here is our simply guide to the next steps;

  1. Remove the lower leaves from the cutting
  2. Dip the cutting in hormone rooting powder (see in store)
  3. In a container of compost make a hole for the cutting and place the cutting into the compost so that the first pair of leaves are just above the compost.
  4. Label the pot clearly, to avoid any confusion later, and when you took the cutting to track its progress.
  5. If you have a heated propagator then you will next use that, however a warm window sill will be sufficient. If you are using a windowsill, cover the container with a plastic bag to prevent wilting. If you are using this method it is important to allow the cutting two 10 minutes of ventilation each week.
  6. The cuttings should be in light, but not direct and hot sunlight. A fleece can be used in order to soften the light.
  7. Make sure that the compost is moist throughout the rooting period.
  8. Most cuttings will take between 6 and 10 weeks to root successfully
  9. After your cuttings have successfully rooted they should be hardened off for around 10-14 days whilst gradually increasing ventilation and then individually potted.

Young Plant in Sunlight, Growing plant, Plant seedling

Coastal Gardening – our tips

With all the benefits that come with living on the coast, there is also the curse of strong winds and salt spray which could hamper your efforts in the garden. However, coastal gardening is not impossible. By understanding the challenges that you are facing and working around these a beautiful garden can be created to flourish even in the tricky conditions.

Shelter

This is probably the most fundamental step in designing a successful coastal garden. Protecting plants from the extreme winds will prevent leaning, abrasion or breaking and allow you to grow more delicate plants. Trees, hedges, shrubs or man made structures will work ideally as a windbreak. It is important to identify the general direction of the wind to erect your shelter in the right place and avoid causing a wind tunnel! A good windbreak will be reduce wind for a distance of 10 times of it’s height. If you are growing your own windbreak it will take time so be patient. You can help along your own windbreak with a shelter such as a mesh screen, netting or woven willow.

Good plants for shelter;

Cordylines are good plants for shelter.

Trees; pinus radiata, escallonias, pittosporums

Shrubs; berberis, pyracanthas, buddlejas

Stay low

Lower plants are much more likely to flourish as the wind will hopefully go over them. Planting in masses with many plants of similar heights can also look great.

Add the colour

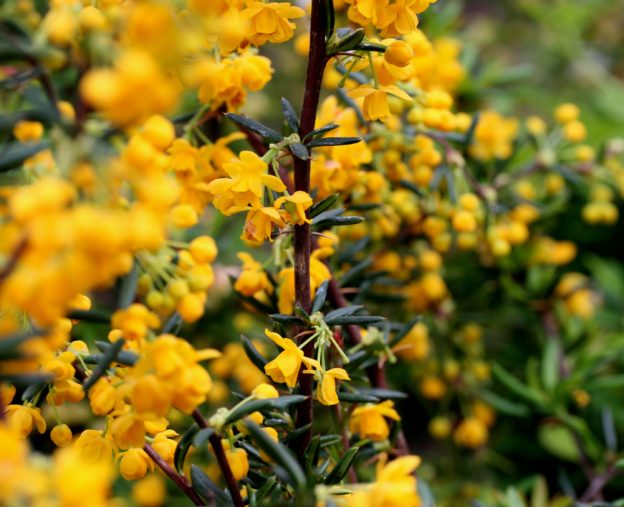
Berberis are good shrubs for shelter and colour in a coastal garden.

Once you have sheltered your garden you can start to add the colour and interest with perennials such as these;

Agapanthus, achillea, lupins, geranium (hardy), kniphofia, hemerocallis, papavers and many more. Ask our experts in store for more advice.

Soil

Coastal soil is known for being nutrient poor and extremely free draining meaning that water retention can become a problem. Mulching the garden soil with the right materials can solve this. Use flint, gravel or grit to mulch and also add nutrient rich dressings such as compost, manure or even rinsed seaweed!

Watering and planting

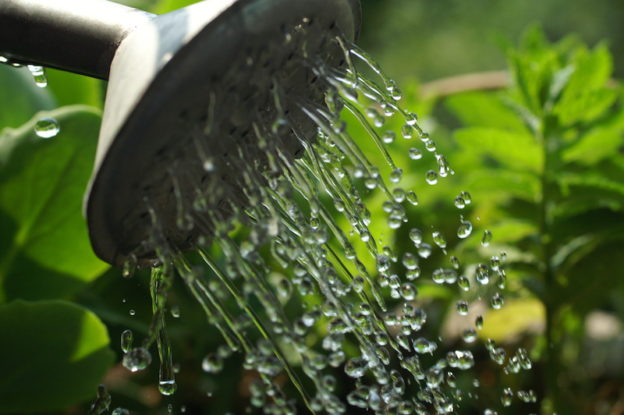
With the evaporation caused by the seaside wind it can be hard to water and plant at the right time. Along with regular watering once in a while it is good to water from above; although this is often discouraged, on the coast it means that you get rid of the salt buildup to prevent salt burn. Also mulch to trap the water. In autumn you should plant any trees and large shrubs in the warm soil to allow them to establish with the winter rains. In spring smaller plants should be planted as their vulnerability means that they need a whole growing season to establish- take care to keep them moist during this season though!

Take it for what it is

The most important thing is to love your coastal garden for exactly that! There is no point trying to turn a garden on the coast into a prim and proper country garden with a perfect lawn and roses. Appreciate the surroundings and take inspiration from them; add some shells, some rope, some driftwood, pebbles and create an interesting and unique coastal garden.

Pests and disease control

Getting ahead with pests and disease control

There are more and more pests and disease around our gardens. Therefore it is important to not only take preventative measures but also actively identify and combat problems as soon as possible.

Prevention is better than cure

On a preventative level it is important to check plants before you buy> You can even monitor them for a few days before planting out. Whilst any good nursery will check its stock before selling plants, from time to time even the experts can be caught out . Luckily for really bad and sinister diseases there are lots of rules and regulations on the transport of plants. In fact plants even have to have a passport if being exported/imported! At St Bridget Nurseries we follow stringent internal quality checks and our nursery is inspected annually by DEFRA. Currently there is a great concern in the industry about a disease called xylella fastidiosa which is a very harmful bacterial plant disease. There have been recent severe outbreaks in Europe and Britain is on high alert.

The importance of local growing

Because we grow nearly 85% of the plants we sell, we keep things local and fresh giving you the confidence of receiving high quality plants that have not been shipped from abroad.

The benefits of having your plants grown locally are numerous. Firstly, they are likely to thrive when you take them from us as they have been grown in the local conditions and are therefore acclimatised to the local climate. Secondly,(with regard to disease) because we nurture our plants right from seeds, they absorb many vital nutrients and become stronger and therefore more resistant to disease. Finally, there is of course no concern about foreign pests.

Avoiding spreading disease

Most pests and diseases you will find on your plants though are most likely already in your garden. Some great tips to try and avoid spreading diseases are as follows;

  • -keep up good garden hygiene by cleaning tools
  • -using disinfectant
  • -covering water
  • -dealing with garden waste appropriately
  •  -prune in dry weather
  •  -mulch around plants such as strawberries to deter pests and keep leaves and fruit away from soil.
  • -try to avoid watering overhead when possible, always try to aim your water onto the soil surrounding your plant.

Following all of these tips will be great for disease prevention. However it is equally important to be able to identify problems by regularly checking and watching the health of your plants. It is also helpful to know the symptoms of disease.

Our garden centres have a wide range of control methods including chemical, organic and mechanical options.  Please ask our friendly team for advice on the options that are availably to you.

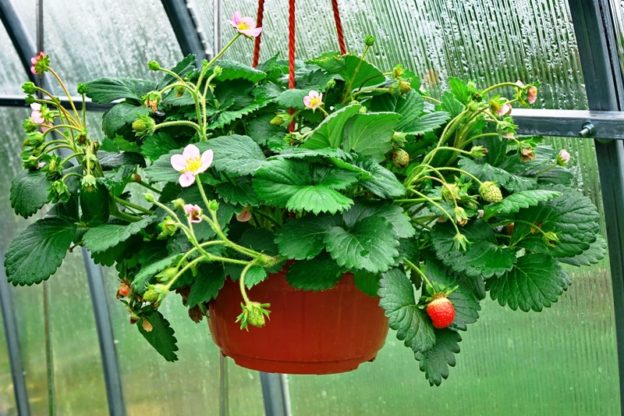
Strawberries being grown in a hanging basket.

Strawberries in hanging baskets

Switching it up with your strawberries

Strawberries make the perfect summer fruit and are one of the most versatile crops. Now you don’t even need a kitchen garden to grow them in!

Hanging Baskets 

Juciy, red, homegrown strawberries.

Strawberries are a tasty summer favourite and can be grown in several different ways!

This season how about growing your strawberries in a hanging basket? With the fruits growing over the edges, they look great and the fact they will have plenty of air circulating around them eliminates the likelihood of mould and mildew occurring. Additionally, because they are off the ground, they are completely safe from the wrath of slugs and snails.  If you don’t want to reach for the heights, strawberries will grow brilliantly in terracotta pots or even in window troughs.

Top Tips

Our tips for growing strawberries in containers are;

  • – keep them well fed and watered.
  • – don’t worry about the lack of soil, it isn’t a problem as strawberries only have shallow roots.
  • -whilst feeding and watering we recommend trying to keep water away from the leaves to avoid fungal diseases.
  • – try this popular feeding trick- to use a liquid tomato feed (like Tomorite) every couple of weeks once the strawberries have begun to flower. This works well due to the high potash content in the feed.
  • – hang your baskets or place your pots in a sunny spot which is ideal to encourage the swelling and ripening of fruits.

Strawberry Varieties

With 7 different varieties being grown here at St Bridget Nurseries, all with different qualities such as yield size, harvest times, disease resistance, flavour and plant shape. There will inevitably be one to suit your garden needs. Speak to our experts if you need more information about the specifics of each variety of strawberry!

Other ‘edible baskets’

If you love this hanging basket idea, it is also adaptable to tumbling tomatoes, chillies,  cut and come again salad and herbs! What will your next edible basket contain?

Rows of tomato seeds being grown into tomato plants for sale in the garden centres.

Time for tomatoes

Tomatoes – tips for your best harvest yet

Tropical Tomatoes

Rows of tomato seeds being grown into tomato plants for sale in the garden centres.

Tomatoes being grown in the nurseries

Originally from South America, tomatoes tend to prefer a warmer climate and suffer when the temperatures drop below 10°C. Consequently, take care not to plant your tomatoes outdoors too early. This will prevent a number of problems such as catfacing (malformation and scarring of the fruit), brown leaf spots and leaf curling. A tomato plant can usually survive these issues and recover in the warmth. However, if it was a surprise frost that caught your tomatoes then the damage is usually permanent and it is best to start over.

Getting the best results from your tomato plants

For best results we recommend covering the tomatoes until you are sure that the weather will be warm enough. A great indicator for this is usually when the temperature remains above 10°C overnight, so buy yourself an outdoor thermometer to check when you next pop in to one of our garden centres.  Next, choose the warmest spot possible in your garden. Ideally keep your tomato plants in a greenhouse or plastic grow-house. Make sure that the spot is also aerated and a fair distance from your potatoes because blight can travel and flourishes in humid conditions. Another option to try out is planting your tomatoes in pots in the sunniest part of your terrace or balcony for great fruit and decoration!

After planting;

  •  Stake or cage all your plants (except if you are growing trailing varieties in a basket or small bush types).
  • Tie the main stem to a vertical bamboo cane (again not for bush or hanging basket types).
  • Remove side-shoots regularly- when they get to about 2.5cm long (again not for hanging basket types).
  • Water consistently– tomatoes grow most successfully when they have consistent moisture. With all watery fruit (like berries) you will get bigger juicier ones with lots of watering. To avoid diseases do not water the foliage but instead aim your water straight onto the root zones and the compost. Irregular watering is the cause of many common problems including cracked fruit and blossom end rot.
  • Remove the growing point of the main stem two leaves above the top truss (stem with small green fruits). This should be done once your vine tomato has grown to have seven trusses if grown indoors, or four trusses if grown outside.

Feeding

Feeding tomatoes should start after the first truss (stem with small green fruits) has set in. We recommend the product Tomorite as it has been a gardener’s friend for decades. It is ideal for other plants too including flowering plants due to the high potash content. It contains seaweed extract which supplies many micro-nutrients and produces full flavoured tomatoes. Outdoors you feed every 7 days, in a greenhouse feed twice a week.

Harvesting

Start picking when fruit is ripe and fully coloured. At the end of the growing season if you have some green tomatoes still on the plant, we recommend this delicious green tomato chutney recipe.

Varieties to choose from

We sell numerous tomato varieties throughout the growing season available in batches as they are ready from the greenhouses. Without a doubt our top selling varieties year on year are;

Gardeners Delight: a flavoursome cherry tomato known for heavy crops and great to grow in tomato bags or pots.

Shirley: an early maturing tomato that is known for heavy crops and also shows excellent disease resistance. Ideal for growing in a growbag or as a greenhouse cordon.

Moneymaker: grown as a cordon (vine) this variety produces smooth, medium salad tomato sized fruit that are delicious in flavour.

Fun Fact

Tomatoes are often treated as a vegetable in cooking and in deed our classification on the garden centre beds. However, the tomato is actually a fruit since its seeds are inside.