Author Archives: Tammy Falloon

Building a Rockery

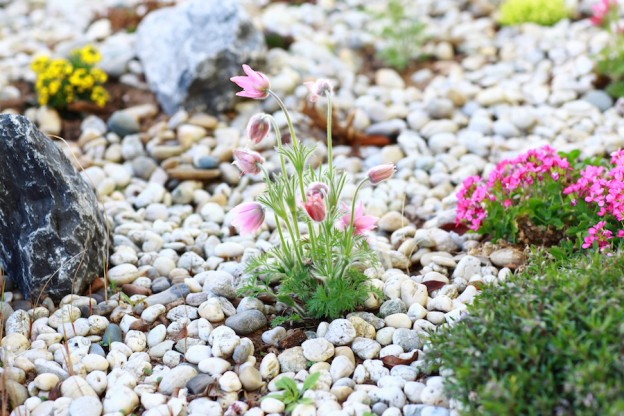
A rockery is a great way to interest and colour in any garden, one can also look fantastic when constructed near a garden pool or around a waterfall. Here is our guide to building a rockery.

Start by making sure your ground is weed free, measure the area you wish to turn into a rockery and order two good sized rockery stones for every square metre of surface area. The soil should be free draining, a mixture of half compost half horticultural grit is good.

Dig the stones deeply into the soil so that sometimes half or two-thirds of the stone is buried. Angle each rock slightly with the front higher than the back (so water will run back into the rockery and not wash off any soil.

Build at random, placing rocks so that pockets of soil are formed between them (this will be where you plant). Be careful not to make the pattern of the rocks to formal and regular, the best look is a natural one – think alpine mountain debris scattered about. Use your imagination and have fun.

After constructing, the fun really starts and you can start to plant. You can use any of our alpine plants but some other plants will do well too, consider dwarf conifers, heathers and dwarf bulbs. Look at the labels of each plant you choose as it will give you a guide on spacing and spread. A rough guide is to allow one plant per square foot. For a fantastic rockery make sure you have plants that will flower all year round. After you have finished planting cover the surface with smaller grit or pebbles to complete the look and suppress weeds. While plants establish themselves water as necessary and check for weeds otherwise a rockery is very low maintenance.

February Beds and Borders

We’ve been asked what could be done in garden beds and borders in February.

Providing the soil isn’t so wet that it sticks to your boots and garden tools, February is a good time to look over your beds and borders to ensure plants are given the best start to the growing year and perform much better in the future. For example, trimming over winter flowering heathers with shears when the flowers have faded to remove the old flowers and about an inch of the growth will not only keep them tidy and more compact but will also improve their flowering next winter. After pruning, give a light feed with a controlled release fertiliser and mulch around them with a composted bark.

If snowdrops didn’t flower well this year, it pays to lift, divide and replant them after flowering and while they still have their leaves. Make sure you improve the soil with compost or composted bark before replanting.

Any dead stems of herbaceous perennials that were left on for winter interest can be cut back to ground level. If any perennials didn’t flower well last year and have formed congested clumps it would be a good idea to lift and divide them, replanting only the healthy new portions from the sides of the clump. This is especially good for asters and phlox which are prone to mildew disease as they get older.

It’s also a great time to get planning for any gaps in your plant beds and maybe adding a bit of seasonal colour to get you through to spring. Our garden centres are full of ideas and our home grown plants will make a great addition to your garden.

Early Spring Colour with Camellias

Get some Early Spring Colour with Camellias, highly valued for their stunning floral displays and fresh, glossy, evergreen foliage. Gary propagates all our Camellias by hand from cuttings each year and it takes about 3-5 years to get to the wonderful bushy forms you can find in our garden centre. With 31 varieties available in shades of pink, red, white and cream, you’ll be spoilt for choice.

Camellias ultimate size, habit and rate of growth vary immensely, so consider how much space the camellia will need as it grows. Whether you’d like something that stays small and compact or will grow into a bold shrub or even a flowering hedge or screen, the choice is yours.

Camellia flowers vary in size and shape too, and their forms can be divided into six descriptive groups depending on the number of petals and their pattern or arrangement within the flower. These forms are described as Single, Semi-double, Anemone-form, Peony-form, Rose-form double or Formal double, so take your pick from the ones that most appeal.

Like azaleas and rhododendrons, camellias are ericaceous plants, and this means they need to grow in an acid or lime-free soil to ensure they stay healthy. A simple soil test kit available from garden centres can be used to check your soils acidity/alkalinity (often called its pH), and composts and fertilisers can be added to help make soil more acid.

Alternatively, compact varieties of camellia grow well in large pots or half-barrels filled with ericaceous compost, available in garden centres.

Grown in the right soil and position camellias usually flower reliably with little care and attention, growing larger over time to develop into impressive flowering shrubs. Most camellias rarely need pruning, but if they outgrow their position individual shoots can be shortened, and plants can even regrow well if cut back hard into old wood.

Where space is available develop a seasonal bed including a camellia or two and other evergreens and early flowering plants to provide welcome colour through late winter and into early spring.

TOP FOUR POPULAR CAMELLIAS FOR POTS OR BORDERS

Literally hundreds of camellia varieties are available from nurseries across the country with numerous colours, forms and sizes. Most have glossy green foliage, but some variegated varieties are also available. The very best camellias are given an Award of Garden Merit (AGM) by the Royal Horticultural Society to indicate their superb garden performance, and here are some of the most popular.

‘Donation’

Semi-double rose-pink flowers. Upright habit. Strong growing.

‘Adolphe Audusson’

Bright red flowers. Strong growing.

‘Debbie’

Peony-form pink flower. Upright. Strong growing.

‘Jury’s Yellow’

Anemone-form white flowers, pale yellow centre. Compact. Upright.

Two others worth noting (sorry couldn’t restrict myself to just four) are:

  • ‘Anticipation’ – Double peony-form rose-pink flowers. Upright.
  • ‘Desire’ – Double white with pink edges. Upright growing.

TOP TIPS FOR GROWING COLOURFUL CAMELLIAS

  1. Early flowering camellias can be damaged by frost, so position plants in a sheltered part of your garden. Move pots to sheltered sites during bad weather. Cover bushes with sheets of fleece to protect buds and blooms on frosty nights, removing it once conditions warm-up in the morning.
  2. Water camellias with collected rain water if possible. Some tap water contains high levels of lime (often referred to as hard water), so avoid using this to water camellias and other ericaceous plants.
  3. Grown in chalky soil or irrigated with hard tap water the leaves of camellias usually turn pale and yellow. Feeding these plants with an ericaceous plant food or iron sequestrene can help them regain their glossy green appearance.
  4. Camellias start forming flower buds during late summer and autumn, so make sure plants never go short of water through the year or poor flower development and bud drop can result.
  5. Make the most of the green framework of camellias to provide support for summer flowering clematis. Plant clematis in the shade at the base of camellias, and let shoots scramble up and over stems to support their summer displays.

DID YOU KNOW?

Did you know that some camellias flower through autumn and into winter? Look out for Camellia sasanqua Fukuzutsumi.

CREATING PLANTING COMBINATIONS WITH CAMELLIAS

Camellias look great with all plants. In my garden they are used to give structural height and colour to borders. Where they look particularly amazing I’ve planted them nearer contrasting lighter coloured hardy shrubs like Euonymus and pittosporum, I’ve also got a few underplanted with cyclamen where both flowers compliment each other in colour. Without a doubt, my garden would look a lot duller at this time of year if it did not have Camellias.

For further advice ask one of our plant team when you next visit our Exeter based garden centre.

Tam Falloon – Director

January lawn care

Providing your lawn is not currently flooded, there are a few ways you can help keep your lawn look nice this January with our January lawn care tips.

Firstly you can redefine lawn edges using a half moon edger tool. This is easy to use, you simply place the half moon shaped blade where you want the edge to be and then place one foot on top before pressing down. You will get nice clear, well defined edges – perfect for tidying up borders.

You can improve drainage of your lawn by punching holes in the lawn with a fork then brush grit or sharp horticultural sand into the holes.

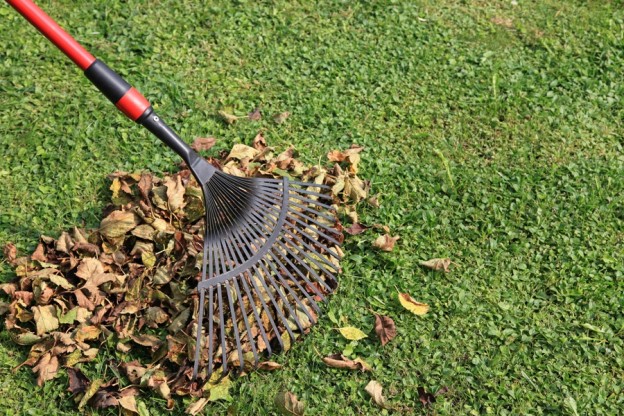
Finally if you have been mowing the lawn and have left grass cuttings on it, we would advise you sweep them up as it is too cold for them to decompose.

Frost-covered berries in the cold of winter.

Frost protection

There are lots of ways the cold can damage your garden. Here are our frost protection top tips:

  1. Stop pots from freezing by raising them on bricks or pot feet then you can wrap bubble wrapping insulation around them and keep them in a sheltered spot.
  2. If you have a pond that contains fish, place a tennis ball or football in the water so if the water freezes you can easily dislodge the ball and make an instant breathing hole in the morning. Alternatively melt a hole in the ice using the bottom of a saucepan of hot water. Provided the pond is at least 45cm deep, wildlife will come to no harm under a frozen surface.
  3. Tender plants (tender is the opposite meaning to hardy) are very unlikely to survive through a frost so ideally you should put them in pots and move into a conservatory or heated greenhouse. Half-hardy plants and those slightly tender can be left outside but protected by wrapping horticultural fleece around them during cold periods.
  4. All plants will benefit from a layer of mulch (such as chipped bark) spread around their stems as this will help to insulate the soil and therefore their roots.
  5. Turn water off to outdoor taps and drain them and / or ensure taps and pipes are well insulated.
Save water by installing a water butt to your down pipe.

Save water

It feels like it’s rained for 40 days and 40 nights at least here in Devon and although today is Blue Monday (18th January 2016) and once again it is raining we’ve decided to look on a positive opportunity – save water!

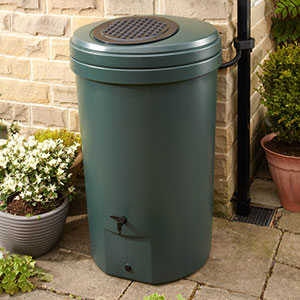
Long range forecasts are suggesting we might just have a hot summer and if we do, what is the ironic chance we may get a hose pipe ban? It would therefore pay to install some water butts on all your down pipes now so you have a ready supply of water when there is no rain.

By installing a water butt you will save money on your water bill and have a handy source of water that’s perfect for many plants – especially rhododendrons, azaleas and other lime haters (since rain is slightly acidic). We sell easy to install kits that will link your water butts to each other and to the down pipes of your house or garage – perfect for saving all that rain water.


Winter Pruning

If you own an apple and/or pear tree, January is the best time to do the main formative pruning for both types of fruit, but only if there’s a really good reason to do so. Pruning just for the sake of it can cause problems later on as the trees can react by producing lots of young shoots that can take three or four years to start fruiting.

Always try to aim to remove a few large branches rather than lots of thin branches. Your tool of choice should be a saw rather than secateurs. Start by removing the four d’s. That’s branches that are dead, dying, diseased or damaged. Then remove branches that are too low, such as those that hit you in the face if you’re mowing and then finally remove any branches that are rubbing each other or crossing from one side of the tree to the other. The aim is to always try and maintain a goblet shaped tree with an open centre. Usually there’s no need to cover the pruning cuts with a sealant, providing you use sharp tools that produce a good clean cut. Only use one when there’s a lot of disease present in the tree and the pruning cuts could spread the disease. Finally to ensure the tree recovers from the shock of pruning and produces plenty of fruit, we would give a really good feed of granular fertiliser in the spring.

Both our centres are well stocked with the tools for the job and our plant team will be pleased to offer some additional advice.

Seed potatoes

Seed potatoes

Seed potatoes are now available to buy from our garden centres. Some of our customers have asked about the best way of getting their potatoes off to a flying start and how to achieve bumper crops so here is our short guide to getting the best results from your seed potatoes.

January is too early to plant the seed potato tubers outside as they’re not frost hardy. Planting out should be done from mid to late spring, but they can be started into growth now. This is called chitting (careful how you say it) and it helps ensure better and bigger crops in the summer. This is a good idea especially for early varieties, but it will also improve the performance of main crops too.

When you get the tubers home, stand them upright with the eye-end, that’s the end with the most buds or eyes as they’re often called, uppermost. You can even stand them in a seed tray or an egg box is particularly useful as it will help keep them stable and upright. You need to then put them somewhere reasonably cool, but frost free and in good light. Within a few weeks the tubers will start to sprout and produce young shoots from the eyes. It’s important that the tubers are kept in good light otherwise the shoots become long and thin. What you’re after are strong, healthy, squat shoots that reach a couple of inches high by planting out time. Then when it comes to planting out, always add plenty of organic matter to the soil plus a good dressing of a general granular fertiliser and if you wish a scattering of slug pellets or other slug control method to help keep these pests away.

If you have a small garden but would still like to benefit from home grown potatoes you still can. Many of our team have grown potatoes in sacks. You can even buy specifically designed sacks with a handy velcro lift up side panel so you can keep an eye on your crop from below and gather your crop easily! We sell small bags of seed potatoes as well as larger ones and with lots of varieties to choose from all that’s left to plan are your potato recipes!

Re-potting plants in containers

We’re always being asked about re-potting plants growing in containers.

Most plants will grow perfectly well in a container, but the size of the container and the vigour or the plant will determine when and if it will need re-potting or eventually planting out in the garden.

Once the pot and compost become full of roots, plant growth will be reduced. Not always a bad thing but eventually this may lead to the plant looking sick or starting to loose its leaves. You’ll certainly need to pay more care and attention to watering and feeding. January is a good time to check over plants growing in containers, if they’ve become pot bound and the roots completely fill the pot it may be time to re-pot them into a larger pot or even plant them out in the garden.

If re-potting, go for a container just one or two sizes bigger than your existing container. Thoroughly water the plant, carefully remove it from the existing pot. If pot-bound, carefully tease out the main roots and then replant into the new container adding enough fresh compost and firming as you refill the pot. Make sure you replant at the same depth it was growing in the previous pot (i.e. the top layer of compost should only go to the existing soil line at the base of the plant stem you’ll therefore have more new compost under the plant).  Plants that are not yet pot pound, can remain in their existing pots for at least another year but they will benefit from top-dressing. Carefully scrape off the top inch or so of compost and replace it with fresh compost. For best results, add some controlled release fertiliser, available from our garden centres.

Weeding top tips

Weeding in your garden is never a fun job, you fundamentally have three choices: prevention, chemical aids (herbicides) or mechanical aids (hoeing) and like most things; prevention is better than cure!

By killing the weeds when they’re seedlings, you’ll ensure they never reach flowering size, so can never set seed and spread themselves even further. Alternatively we are fans of mulching the soil, by adding a mulch or soil covering of bark or similar material, that’s at least 2 inches but preferably 3 inches thick you prevent the weed seeds germinating in the first place. As an added bonus, a mulch will also insulate the roots from frost and cold weather as well as keeping the soil moist during periods of drought. When you’re planting new beds and borders, it’s a great idea to plant through a weed suppressing planting membrane. These are laid on previously prepared soil, the membrane is pulled tight and the edges buried in the soil. X-shaped slits are cut in the fabric to plant through. Once planting is complete, cover the membrane with a thin mulch of bark, gravel or other material to hide it.

The final method we like to use is employing ground cover plants. These are simply low growing plants that cover the soil preventing weed seed from germinating and competing with any that do grow. Good choices include hardy geraniums, periwinkle, aubrietia, hostas and ground cover roses. But there are dozens of other choices so ask our staff for advice when you visit one of our garden centres.