Author Archives: Tammy Falloon

Pot ponds

When it comes to having a pond, you don’t need a mansion with a pond the size of a lake (though if you have a mansion why not)! Many ponds, especially ponds for wildlife, can be created in a simple pot. As well as attracting a range of insect life and maybe the odd amphibian, you will be able to grow a new range of plants namely aquatic and marginals.

Step One

Choose a pot from a garden centre (ours have a wonderful selection). If your pot has a drainage hole, block it up with a silicone sealant. If the pot is made from a porous material like terracotta,  seal the inside with yacht varnish. Alternatively you could line your pot with pond liner or choose a water tight container like a beer barrel.

Step Two

If you have a deep pot marginal and emergent plants need only a few centimetres of water, so sit them on upturned empty aquatic plant pots or other pots to raise them up.

Step Three

Put the pot where you want the finished pond to go. Fill the pot with rainwater or water that has been left to stand for a few days to de-chlorinate. Rainwater also helps nutrient levels stay low and avoids algal blooms that green your water.

Taking care of wildlife

If you pot is deep, ensure frogs, toads, newts and hedgehogs can get out by ensuring there are shallow areas at the edge of the pot e.g. stones or wooden ramps or a partly submerged stick.

Plants to consider

Look out for dwarf waterlilies and other compact growers. Ask our aquatics team for advice. Our range of aquatics plants are always changing so do keep popping in to see what is new. Native water plants are always a good bet, such as water crowfoot (Ranunculus aquatics), brooklime (Veronica beccabunga) and rigid hornwort (Ceratophyllum demersum).


Waterwise gardening

It has been a very dry spring and summer has started off rather hot for many of us. We certainly have felt the extra watering demands on the nursery and in the garden centres. Getting into good waterwise habits at home is always a benefit not least in times of summer drought. Here are our top waterwise gardening tips for this summer:

Use Grey water

Ok so it may not necessarily be grey but grey water is the term given to water used in households. Whilst we may not want to drink our bath water, plants aren’t so bothered. It is estimated that UK households use 29% of mains water for baths and washing up. You could syphons bath water to fill watering cans and take your washing up bowl outside to water your plants. Just ensure you let the water temperature cool before you use it and don’t store grey water as this will bred germs. Equally we don’t recommend using grey water on crops you will eat raw.

Prioritise plants

Most established plants in borders will cope with a period of drought and green up again after rain comes. Prioritise your watering needs to plants that really need it such as new plantings, plants in containers, seeds and seedlings and crops (fruit and vegetables).

Go automatic

Installing a timer controlled irrigation system t your garden can limit the amount and amount of time you water your garden. Control timers (like those from Hozelock or Flo pro) can be fitted to your tap and then connected to hoses which in turn connect to drip feeders or sprinklers. Drip irrigation reduces water loss through evaporation as drips are feed directly to the roots where plants need the water. Low pressure systems can even be fitted to rainwater butts.

Timing

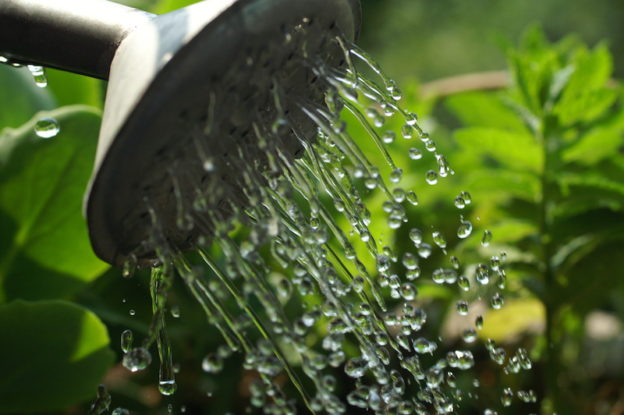
Always water either first thing in the morning or in the cool of the evening. This minimises the amount of water you will loose to evaporation.

Harvest

You can install a water butt to any rainwater downpipe you have on the outside of your building. It’s simple to install and you can link several water butts together. Collecting rainwater is free and means that you have a ready supply of garden water when the sun comes out to play!

Find everything you need for waterwise gardening at our Exeter based garden centres.

Summer’s here and so is our new radio advert

Well summer has arrived and unlike last year (wet and typically British) we’re sizzling in record breaking temperatures! We couldn’t have picked a better day to launch our new Heart Radio advert. Take a listen to find out what we have waiting for you in store this summer…

Tune in to Heart Radio at 97.0 and 103.0 FM and http://www.heart.co.uk/exeter/


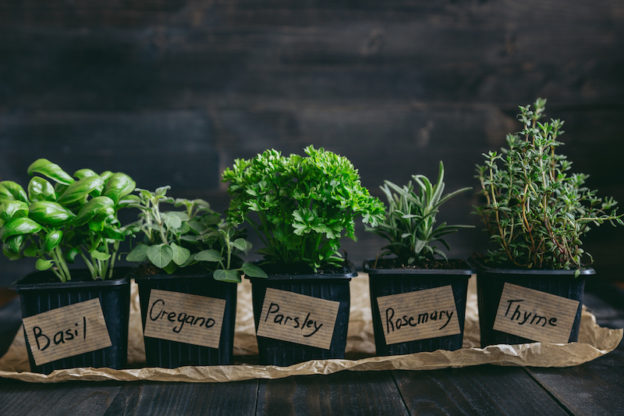
Fresh herbs are a great addition to any garden.

Harvesting Herbs

June is the perfect month for harvesting herbs.

Choose a dry sunny morning (before thereat of the day releases the herb’s essential oils). Cut shoots and tie them into small bundles. Hang the bundles upside down in a warm place (like an airing cupboard). Alternatively you can microwave them. Place the sprigs in a single layer on a sheet of kitchen paper, microwave for 2-3 minutes but check and rotate them every 30 seconds. Once cool, crumble them up and store. For herbs that are hung dry (better option), once dry strip the leaves from the stalks and store the leaves in glass jars.

Freeze storage

Alternatively, chop your fresh herbs up and freeze them in ice cube trays. Simply add one tablespoon of water for every tablespoon of herbs. This is a good method for parsley, basil, mint, basil and borage flowers.

Summer Pruning

Summer Pruning

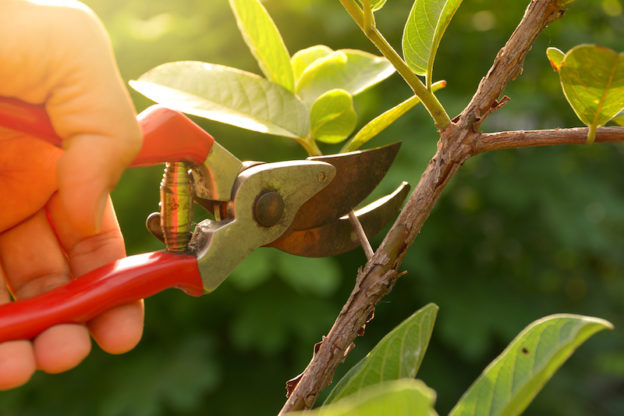
The main aim of the game with Summer Pruning is to get new stems to bear flowers, control vigorous shoots, firm up this year’s wood and tame new shoots. One important top tip is not to prune in a drought, as plants will lack vigour and pruned stems could die back.

Plants to deadhead after flowering

After flowering, some ornamental plants will go on to form colourful berries, fruits, hips or seedheads so think carefully before you go attacking every plant in your garden. The plants you want to prune are those where unwanted seed development will take away energy from the plant and ones whose flowers stay on and rot which can cause damage to leaves and shoots as well as looking unsightly. We suggest you deadhead your lilacs (Syringa), Rhododendrons, Chaenomeles, Roses and Summer Perennials once they have finished flowering. As a rule of thumb simply hold the flower in your hand, visually slide down the flower stem until you come to a leaf, cut  the stem just above this leaf.

Plants to prune for fruit and flowers

Spurs are short shoots that produce flowers and fruits. Pruning spurs on top fruit like apples and pears and also on wisteria helps to put energy into buds at the base of the shoot rather than continuing new growth. Shorten all of this year’s growth back to a few bugs from the base of each stem. You will get more flowering buds, a bigger crop and the plant will be more energy efficient!

Plants to prune include apples, currants, gooseberries and pears.

Plants to tame

To maintain a formal look and keep the garden trim and tidy, prune back cotoneaster, pyracantha (mind the spikes), climbing and rambling roses and wisteria. If you regularly the in stems of these plants to wires and supports you can train them to cover walls, fences and other structures. However once your space is covered further growth should be trimmed and kept within its boundaries. Regular summer training will help to keep the structural appearance of your plant.

Plants to shape up

Prune bay, box (Buxus) Euonymus and Yew (Taxus) to keep things tidy and encourage more side shoots. You can also clip these plants to form topiary shapes. Pinching out shoot tips will encourage side shoots further down the stem and result in bushier growth.

Prune to prevent infection

Plums and cherries should only be pruned in summer. This is because the silver-leaf disease is carried in spores by the air in winter. If these spores get in pruning cuts you will have trouble. Pinch or cut the current season’s growth back to a couple of buds along each stem. Other plants to trim back for this reason are Rhododendrons, apricots and laburnum.

Other plants to prune in June and July

Forsythia: prune after flowering removing some old stems and shortening younger ones.

Evergreen Ceanothus, prune after flowering shortening all shoots by a third to half. Never cut back into old unproductive wood (i.e. just sections with green leaves on).


The Flower Garden in June

June is a wonderful time for enjoying the beauty of our gardens, with flowers blooming brightly but the mixture of rain and sunshine makes everything flourish at once and quite easily the garden can become a jungle. Here’s a few considerations for the flower garden in June:

  1. Thin direct sowings of hardy annuals (plants that only last a year).
  2. Remove blanket weed from ponds by twisting it around a stick (like candy floss). Leave the weed at the side of the pond so it allows any wildlife to crawl back into the pond.
  3. Keep your flowering tubs and hanging baskets watered. Remember that strong winds can be just as drying as hot sunshine.
  4. Protect delphiniums, lilies and hosts from slugs and snails. There are many slug controls that we sell: traditional pellets, organic pellets, slug wool (a natural deterrent), nematodes (natural deterrent) plus gels and other products.
  5. Take softwood cuttings of deciduous (plants that lose their leaves) shrubs like Caryopteris, Spiraea and Buddleja.
  6. Add lawn clippings to your composter in small amounts, mix with drier material to avoid a soggy mess.
  7. Liquid feed your containerised plants. You can buy ready mixed feed or concentrate for you to mix in a watering can. Always read the label.
  8. Divide bearded irises after flowering. Replant sections that have at least two fans of leaves attached.
  9. Stake tall plants like Delphiniums and larger lilies.
  10. Trim topiary like Buxus (box).
  11. Sow winter flowering pansies and ornamental cabbages.
  12. Tie in shoots of climbing and rambling roses as horizontally as possible to encourage better flowering.

For further advice, our garden centre staff are always pleased to help.

The Kitchen Garden in June

The Kitchen Garden in June can be a busy time. Here are some tasks you may want to be thinking about:

  1. Continue planting out or direct sowing French and Runner Beans.
  2. Check Gooseberries for sawfly larvae. These look like caterpillars and they will eat all your leaves. Hand-pick (and squash) the culprits or spray with a suitable approved insecticide or organic alternative suitable for use on fruit and vegetable plants.
  3. Protect other soft fruit from hungry birds by securely covering with netting.
  4. Water tomatoes thoroughly and regularly to help prevent blossom end rot.
  5. Sow fennel and oriental greens like pak choi.
  6. Use gaps between your slow maturing brassicas to sow quick maturing salad leaf crops or radishes.
  7. Sow carrots for storing through the winter like Autumn King 2.
  8. If you have leek transplants, plant them when they are pencil thick into deep holes (6 inches deep/15cm) and water well.
  9. Sow squash, sweet corn and pumpkins directly into prepared ground.

For further help and advice please see our helpful staff in store.

Fresh herbs are a great addition to any garden.

Planting a herb container

Herbs are brilliant grown in a pot. Not only do they look attractive but they smell good and can be conveniently located near the back door for ease of access to the kitchen. Planting a herb container also restrains vigorous herbs like mint and sage, known to grow rapidly and spread in borders.

Many herbs are perennials (come back to growth year after year) but it is nice to add some annuals (plants that grow for only one season) into your container too, such as basil.

Here is our step by step guide to planting a herb container:

  1. Choose a container or containers to plant in. You can pick up purpose made herb or strawberry pots from our garden centres. These have planting holes in the side of them. Alternatively you can choose a traditional terracotta pot or trough. Make sure your containers are porous (unglazed) as this will assist with drainage.
  2. Select the herbs you want from the selection available in our garden centres. Pick your favourites for taste and then maybe add one or two for their colour or fragrance.
  3. Buy some loam-based compost like a John Innes No 2 and add up to a third of horticultural grit or perlite for added drainage (herbs hate standing in water).
  4. Fill your container to either the level of the first planting holes (if you chose a container with holes in the side) or 3 inches from the top of your traditional pot. Start with the lowest planting holes first, feeding the roots through the hole carefully and laying compost on top as you work your way upwards. Once you have your plants in the position you want them (allowing space for growth), fill the area around their roots with compost, tapping the container gently to shake the soil about and remove any air pockets.
  5. Water plants in, but do not overwater.

Looking after your herb container:

Many herbs grow well in pots initially but can decline or lose vigour over time. You can divide and re-pot herbs easily and doing this each year will keep your herbs looking fresh. Do this in early spring and only retain the growing outer portions of the rootball and discard the older central section. Use your hands to gently tease the roots and plants apart.

Regularly harvesting your herbs encourages them to remain bushy and compact. Use new shoots as fresh herbs or dry them for later use. You can do this by tying your harvest in a bundle with string and then hanging them in an airing cupboard. Once dry, chop them up and store in glass containers – just like the ones you buy in the supermarket.

In winter, herbs (even the hardy ones) are vulnerable to frost damage. Rootballs can freeze and winds strip moisture from leaves. Keep your herb container fairly dry where possible and in really cold snaps move your container into an unheated greenhouse, porch or conservatory. This helps prevent your pot from cracking with the frost too.


Royal presentation!

We are thrilled to announce that our exhibit of plants at the Devon County Show has not only won a large gold medal but also the Midmay-White Perpetual Challenge Trophy for the best exhibit in the Flower and Garden Show.

Trophy presented by Sophie, Countess of Wessex.

To make this accolade even more special, our Devon County Show team led by Gary, were presented with the Trophy by Sophie, Countess of Wessex today (Friday 19th May 2017).

Sophie, Countess of Wessex presenting Gary Allum with the trophy

Preparation for this year’s show display started last May by ensuring we held back large specimens of plants from sale and kept an extra close eye on their growth in our greenhouses. This group of plants were added to over the following months and show labels prepared for each variety. Gary Allum, our propagation supervisor, oversaw all this preparation and led the design of this year’s display.

Whilst we always go to the show with a design in mind, the final construction is always quite fluid and can involve many last minute changes!

Building an award winning display

On Monday 15th May, we take out all the plants to the show ground. This year we had 18 Danish trolleys full plus large trees and shrubs that have to be carried by hand. We also had a bug hotel to construct, water fountain to install and a garden bench.

How it all begins...18 trolleys of plants

18 trolleys of plants and materials

On Tuesday 16th May, the construction team (Gary plus company director Tammy Falloon and James Sellick, Clyst St Mary garden centre shop supervisor) set to work. The initial stage involves positioning the tallest plants in position we then work our way out ensuring that we mix leaf textures, avoid colour clashes and generally working in harmony to allow each plant to be showcased beautifully. Whilst the final effect looks like an established garden the reality is these are plants in pots stacked on pots and boxes and sacking.

Step one: positioning large anchor points first like trees.

On Wednesday 17th May, the team finish positioning the plants before labelling every variety. We then scan the plants, removing any damaged leaves or dead flowers and covering any visible pot with moss. We run a border of bark wood around the edge to disguise the pots and then rope off the display ready for judging in the morning.

By the end of Tuesday we have most plants in place

Thursday 18th May and the show opens! We find out what medal we have won around mid morning and it was only in the afternoon that we were told we won the trophy. We love exhibiting at the show and meeting visitors.

James, Tammy and Gary who constructed our Devon County Show display.

Our Devon County Show team

Still time to come and see us on the final day of the show

If you are able to visit our stand, this year then please do. You will get to see our trophy winning display as well as enter our competition to win £50 of St Bridget Gift Vouchers. Additionally we are giving out money saving coupons to use in our garden centres and you can buy plants from our stand. At 4pm on Saturday 20th we start the dismantling process and we are permitted to sell off the display plants. We use a ticket system for this where by the first ticket holder gets first choice of plants. The plants are sold at reduced prices so it’s worth grabbing a bargain.

The “bench” side of our display.

Close up of the plants

We hope to see you there tomorrow!

Garden colour with lettuces

Growing lettuces

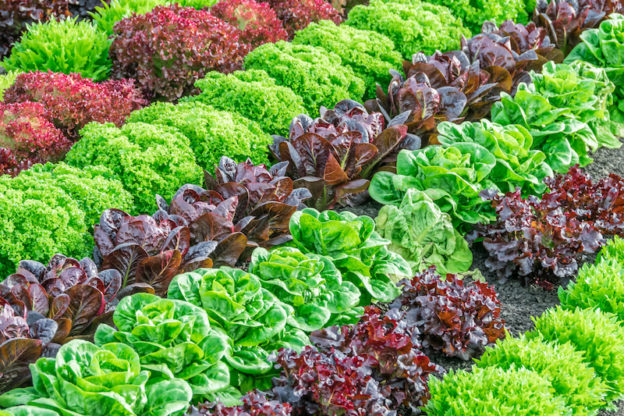
Not only are lettuces delicious in salads but their diverse shapes and colours make them an interesting addition to the garden. Increasingly, there is also a trend to grow lettuces in troughs or even hanging baskets.

To get the best results, lettuces will prefer a fertile soil, ideally one that was improved with well-rotted organic matter last autumn. But if like many of us you are playing catch up just choose a good multi purpose compost or cut open a vegetable gro-bag and use the contents. We also recommend adding some growmore to the soil about a week before you sow your seeds. Make sure the growmore is evenly distributed and mixed in.

Sow your lettuce seeds in succession to ensure you have a continuous crop. Perhaps sow them every two weeks between now and July. If you are only sowing a trough or basket one packet of seeds will give you plenty to do this with otherwise if planting a larger area you may want to choose several varieties and sow 1cm (half an inch) apart in 5cm (2 inch) wide drills.

TOP TIP:

Because of their interesting colour and shape. Lettuce plants could be added to any gap in the garden. To do this we recommend sowing your seeds in “cell trays” these are plastic trays with individual planting cells. They enable you to grow your seedlings to a reasonable size before planting out. Alternatively you can buy lettuce plants that we have grown in our greenhouses and miss the sowing stage altogether.

What variety?

There are many varieties available to grow so you may want to scan the seed section at our garden centres and study the description on the packets. However, here is a condensed list of our favourites:

Cos: Cos (or Romaine) are traditional Mediterranean lettuces. They range from mini ‘Little Gem’ to mid sized “Chartwell” and large “Lobjoit’s Green Cos” or “Paris Island”

Leaf Lettuce: Usually purchased in mixed packets these lettuces range from frilly ones to oak leaf shaped ones to low rosettes. “Lollo Rossa” is a well known cultivar.

Butterhead: These reliably hardy, round shaped and soft-leafed varieties. Their hardiness make them a good choice for early crops but they can be very light on flavour. Look out for “Tom Thumb”

Crisphead: Icebergs are the leader of the pack in this category. Crisp dense heads that refrigerate well. These varieties can bolt in drought and tend to require a longer growing season.

What is bolting?

Bolting is quite simply “going to seed”, the plant’s aim in life is to reproduce and quite simply something has triggered the plant to feel it necessary to flower and create seeds earlier than a perfect life cycle. In the case of lettuce, a lettuce will bolt (put all energy into flowering and creating seeds) after a sustained period of warm weather that has followed a previously cold period. If a lettuce bolts it will create bitter tasting leaves.

Lettuce tends to bolt very quickly, putting out long seed stalks.  Once it starts, you literally have only a couple of days to deal with it before the lettuce crop is ruined.  Once the seed shoots appear, you can trim them back, but be prepared to do this daily in order to keep them back.

To prevent bolting, planting leafy lettuces in the spring and continually harvesting (cutting them back) during the year should work. Starting your lettuce indoors well before the frost lifts is another option. The shock of the transplant process means that the lettuce will be well through its lifecycle by the time the heat of summer really sets in.

Harvest

After about three weeks from sowing you will need to thin your plants to 5cm (2 inches) apart. Use the baby leaves you remove in salads. Then from 5-6 weeks after sowing you will be able to remove further young leaves and progressively thin out your plants. If left to mature into a dense head, most lettuces will be ready to harvest as a whole just 10 weeks after sowing.


For all your lettuce seeds or plants, cell trays, compost and growmore, simply visit one of our Exeter based garden centres.